 Entry
Entry Dashboard
 Contacts
 Properties
 Email
Email Calendar
 Tasks
Tasks Acquisition Cockpit
 Audit-proof mail archiving
 Automatic brochure dispatch
 Billing
 Groups
 Intranet
 Marketing Box
 Multi Property module
 Multilingual Module
 onOffice sync
 Presentation PDFs
 Process manager
 Project Management
 Property value analyses
 Enquiry Manager
 Showcase TV
 Smart site 2.0
 Statistic Tab
 Statistics toolbox
 Success Cockpit
 Time Tracking
 Address from clipboard
 Text block
 Customer communication
 External Tools
 Favorite links
 Calculating with formulas
 Mass update
 onOffice-MLS
 Portals
 Property import
 Quick Access
 Settings
 Templates
 Step by step
You are here: Home / Additional modules / Automatic CSV export

Automatic CSV export
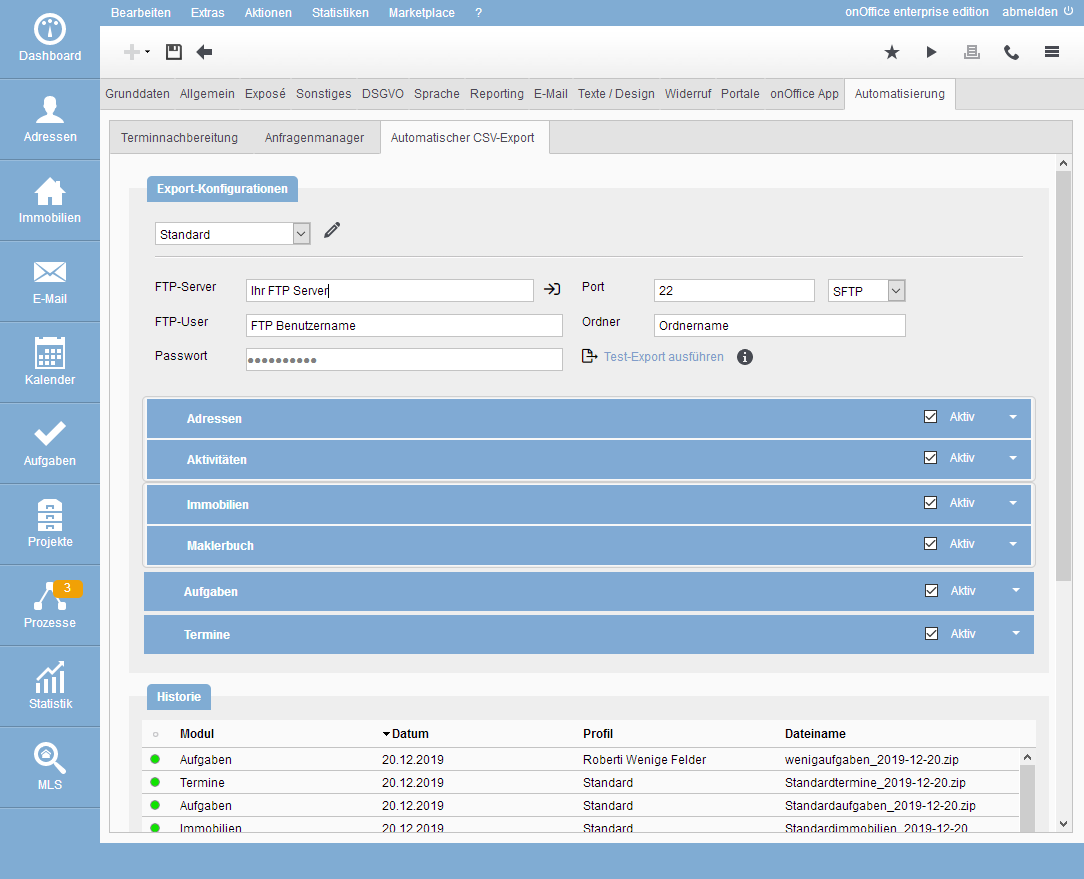
Export Profiles
You can create several profiles for export, these can be different target FTP servers or different data and ranges.
The number of possible profiles is limited (currently enterprise 1 profile, enterprise_plus 3 profiles, enterprise_pro 5 profiles). You can create a new profile using the plus symbol. When all profiles are used, the plus symbol is no longer visible.
We recommend using a secure connection via SFTP.
After you have entered the connection data, you can test it using the icon next to the FTP server input field.
Please remember to save the profile via the diskette symbol ![]() .
.
Configure export content
For each export profile, you can configure and activate the individual areas – contacts / activities / property / agent’s log/ tasks / projects / appointments – in the boxes.
Please select the desired profile from the drop-down menu.
For each box, you can specify whether an export should take place or not by checking the “Active” box. The information in the box is checked when you activate it for export.
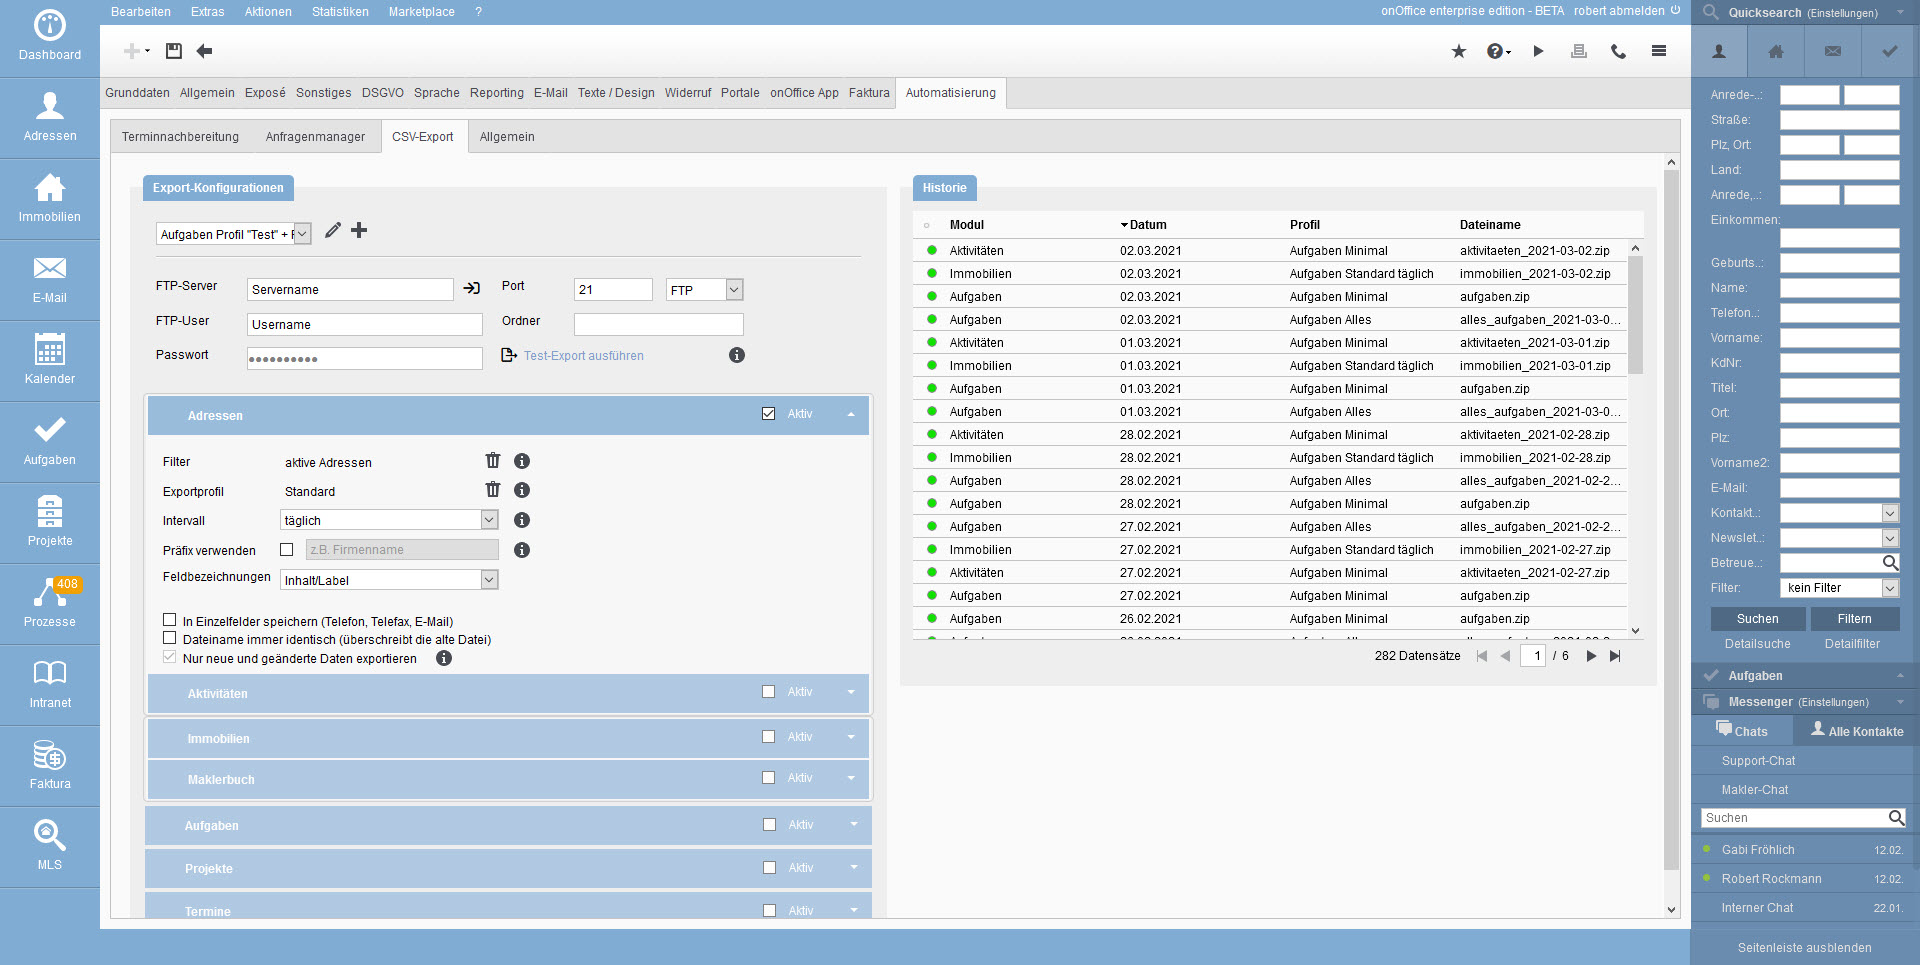
Within the box you can configure the export of data for the corresponding module. The content is always structured similarly, we explain the configuration here using the example of contact export.
Mandatory entries for contact export are the export profile and the interval (or period). These are checked when activating or saving activated configurations – missing entries are marked red.
If you open the box using the arrow on the right side of the title bar, the individual settings will appear.


