 Entry
Entry Dashboard
 Contacts
 Properties
 Email
Email Calendar
 Tasks
Tasks Acquisition Cockpit
 Audit-proof mail archiving
 Automatic brochure dispatch
 Billing
 Groups
 Intranet
 Marketing Box
 Multi Property module
 Multilingual Module
 onOffice sync
 Presentation PDFs
 Process manager
 Project Management
 Property value analyses
 Enquiry Manager
 Showcase TV
 Smart site 2.0
 Statistic Tab
 Statistics toolbox
 Success Cockpit
 Time Tracking
 Address from clipboard
 Text block
 Customer communication
 External Tools
 Favorite links
 Calculating with formulas
 Mass update
 onOffice-MLS
 Portals
 Property import
 Quick Access
 Settings
 Templates
 Step by step
You are here: Home / Tutorials / Step by step / Administrative instructions / Create new mailbox

Step by step
Create new mailbox
In order to create a mailbox in onOffice, you must already have a domain (e.g. @enterprise.de) with onOffice. This is then available to you for creating the new mailbox. Enter the desired name of the mailbox in the field provided and click “Create”.
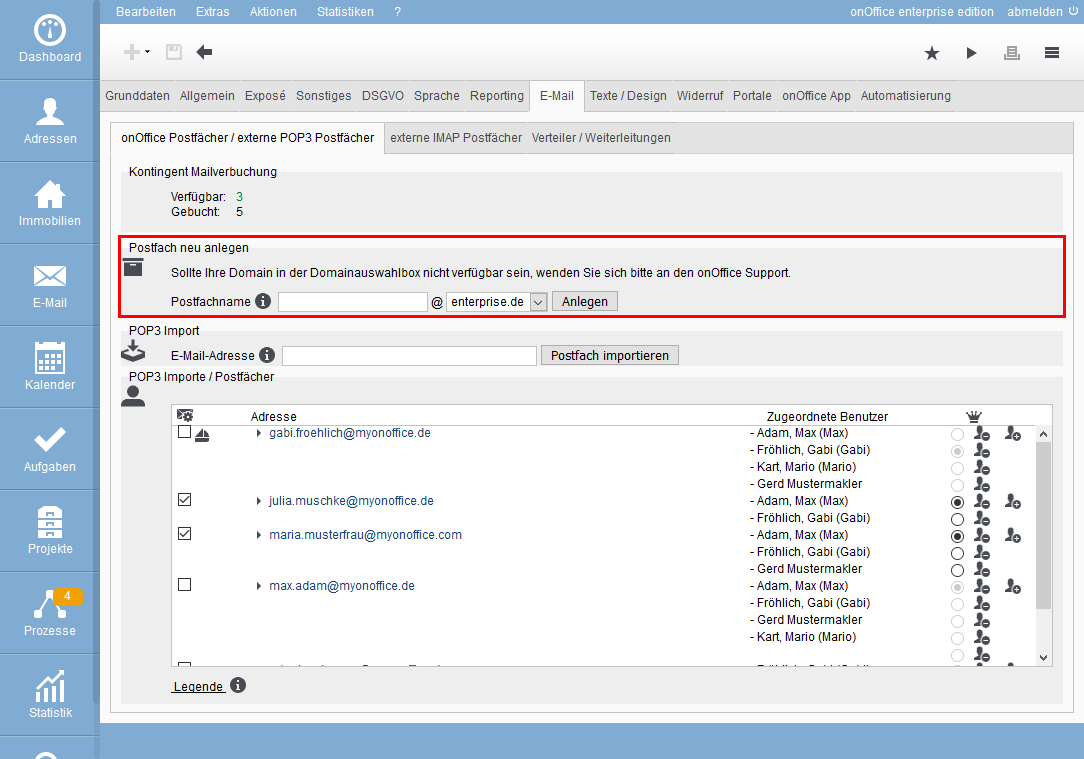
If you do not yet have a domain with onOffice, please contact the sales department, they will prepare a suitable offer for you.
Activate mailbox
Now the created mailbox appears in the list with the possibly created mailboxes. As soon as you click on the name of the mailbox, you will receive the detailed view in which you can deactivate the mailbox and enter an out of office note.
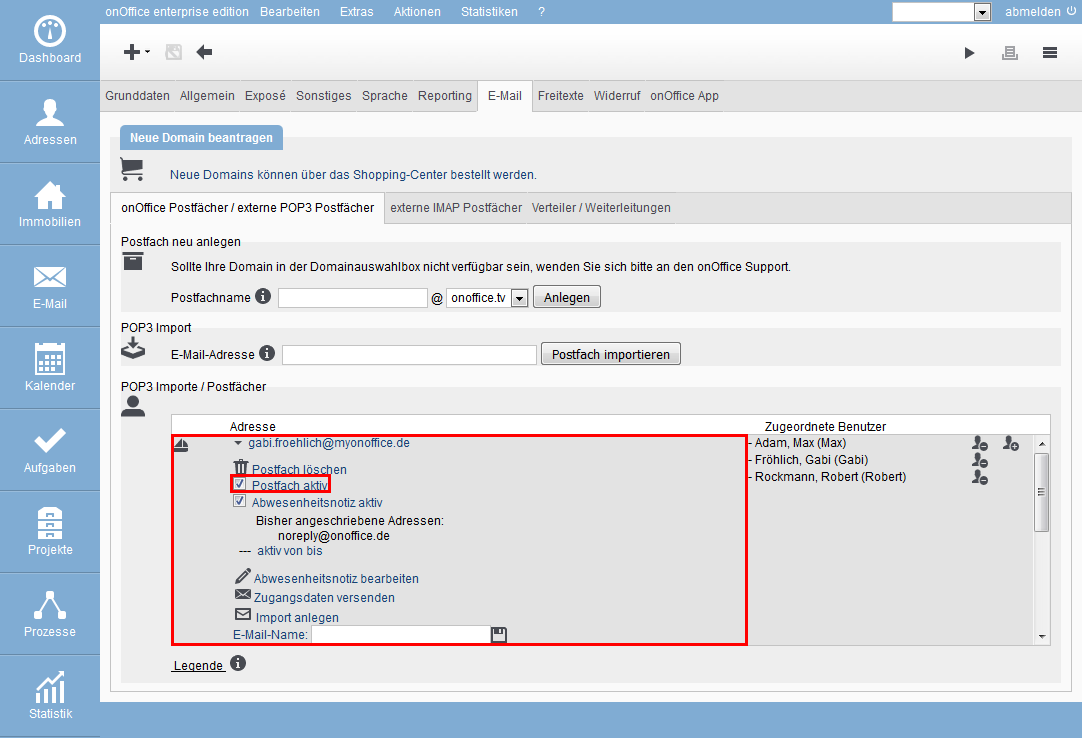
Assign a user to the mailbox
In order to have access to the mailbox in onOffice, it must still be assigned to a user. To the right of the P.O. box are two person symbols. If you click on the person with the +, you will be given the opportunity to select a user. Then click on the floppy disk to save the assignment.
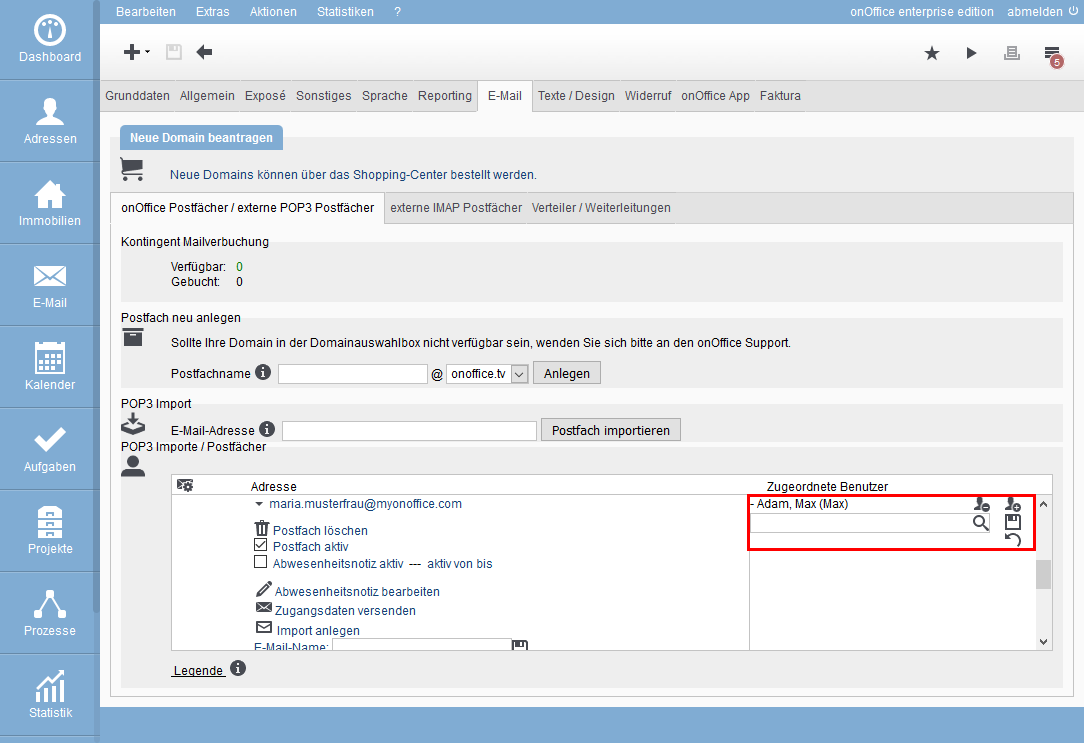
It is also possible for several users to gain access to a mailbox, just repeat the process for the other users.
Importing the mailbox into Outlook
If you want to retrieve the mailbox with another software (e.g. in Outlook), you need the correct access data. You can simply have them placed in your mailbox via “Send access data”.


