You are here: Home / Tutorials / Step by step / Administrative instructions / Set up POP 3 import

Step by step
Set up POP 3 import
With onOffice, you have the option of setting up your own mailboxes by requesting a domain from onOffice. Or you can integrate your existing mailbox into your onOffice enterprise edition.
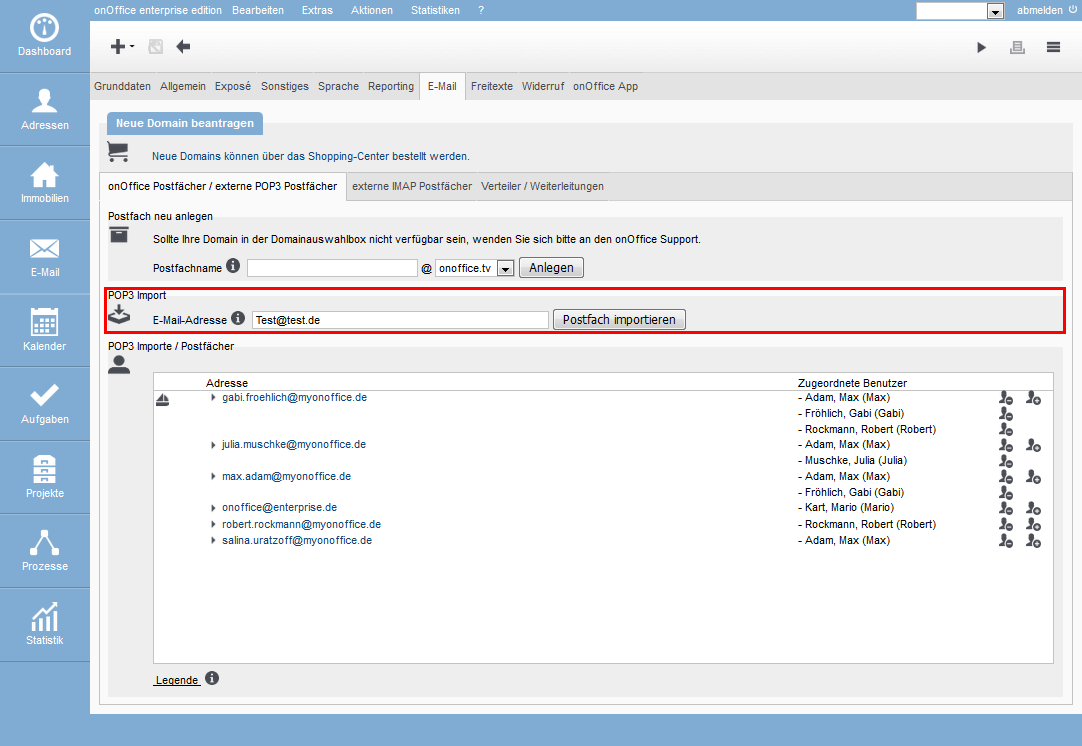
Open Extras >> Settings >> Basic settings >> E-mail tab to set up the POP3 import of your mailbox.
Inhaltsverzeichnis
The required access data
Before you start to set up an import, please make sure that you have the following data available:
- E-mail address
- User
- name Password / password
- Incoming mail server
- Outgoing
mail server The host of your e-mail address makes this data available to you.
If you want to import a POP 3 mailbox Select the tab “onOffice mailboxes/ external POP3 mailboxes” on the tab “E-Mail”. Here you have the possibility to create a new e-mail or to import your existing addresses. If you want to import an e-mail address, enter it in the field under POP3 Import.
Then click on the “Import mailbox” button.
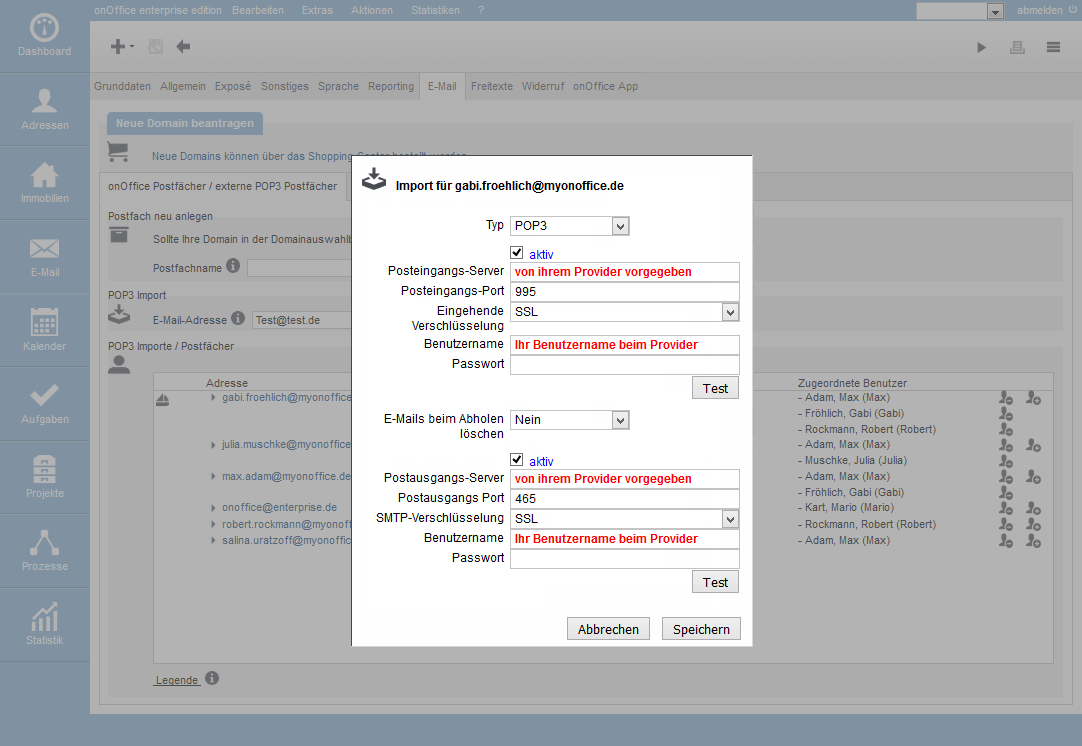
Please enter the requested data in this mask. As soon as you have entered the data, you can use the “Test” button to check whether a connection to the original mailbox can be established with this data. If this fails, please check the entered data for correctness.
Encryption
If your e-mail provider does not tell you which encryption to choose, you can choose between two different encryption methods:
- SSL encryption
- TLS
encryption Delete
e-mails on retrieval Here you can set whether the e-mails should be deleted on the server or whether this should only be done after a certain period of time.
If you are not sure whether you still need your e-mails on your server, please click on “No” to prevent deletion.
Assign a user to the mailbox
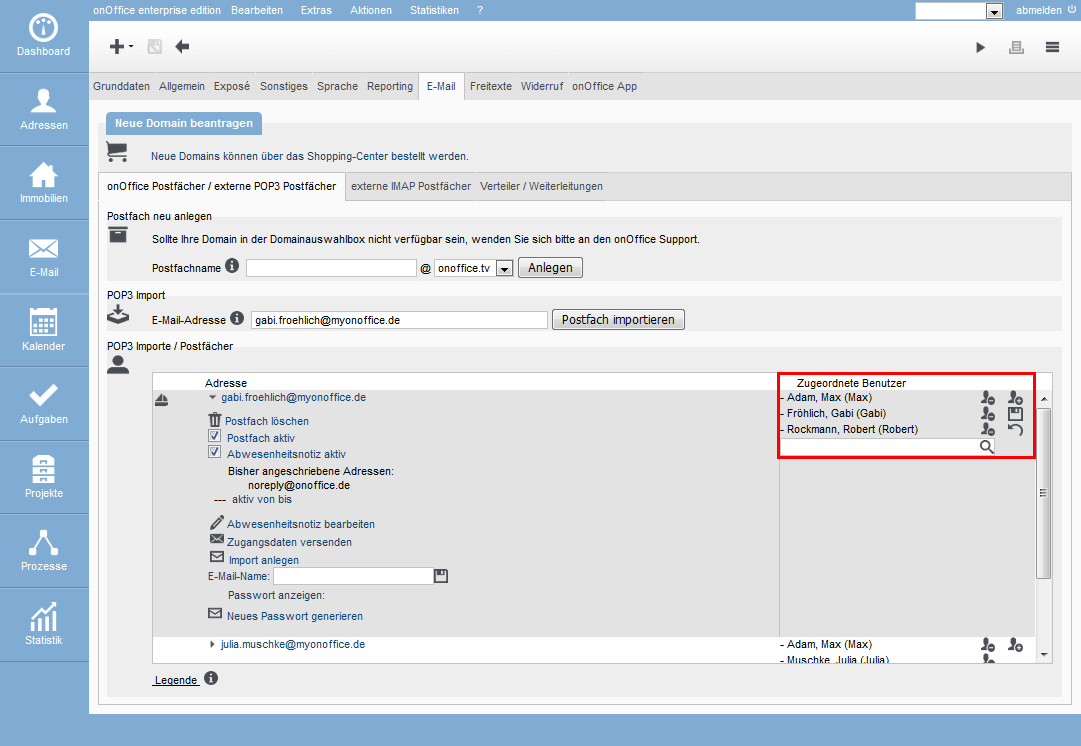
In order to have access to the mailbox in onOffice, it must still be assigned to a user. To the right of the P.O. box two people are depicted. If you click on the person with the “+” symbol, you will be given the opportunity to select a user. Then click on the floppy disk to save the assignment.
Now the mailbox is available for the selected users.

 Entry
Entry Dashboard
 Contacts
 Properties
 Email
Email Calendar
 Tasks
Tasks Acquisition Cockpit
 Audit-proof mail archiving
 Automatic brochure dispatch
 Billing
 Groups
 Intranet
 Marketing Box
 Multi Property module
 Multilingual Module
 onOffice sync
 Presentation PDFs
 Process manager
 Project Management
 Property value analyses
 Enquiry Manager
 Showcase TV
 Smart site 2.0
 Statistic Tab
 Statistics toolbox
 Success Cockpit
 Time Tracking
 Address from clipboard
 Text block
 Customer communication
 External Tools
 Favorite links
 Calculating with formulas
 Mass update
 onOffice-MLS
 Portals
 Property import
 Quick Access
 Settings
 Templates
 Step by step


