Entry
Entry Dashboard
 Contacts
 Properties
 Email
Email Calendar
 Tasks
Tasks Acquisition Cockpit
 Audit-proof mail archiving
 Automatic brochure dispatch
 Billing
 Groups
 Intranet
 Marketing Box
 Multi Property module
 Multilingual Module
 onOffice sync
 Presentation PDFs
 Process manager
 Project Management
 Property value analyses
 Enquiry Manager
 Showcase TV
 Smart site 2.0
 Statistic Tab
 Statistics toolbox
 Success Cockpit
 Time Tracking
 Address from clipboard
 Text block
 Customer communication
 External Tools
 Favorite links
 Calculating with formulas
 Mass update
 onOffice-MLS
 Portals
 Property import
 Quick Access
 Settings
 Templates
 Step by step
You are here: Home / Additional modules / Success Cockpit / Create cockpit

Success Cockpit
Create cockpit
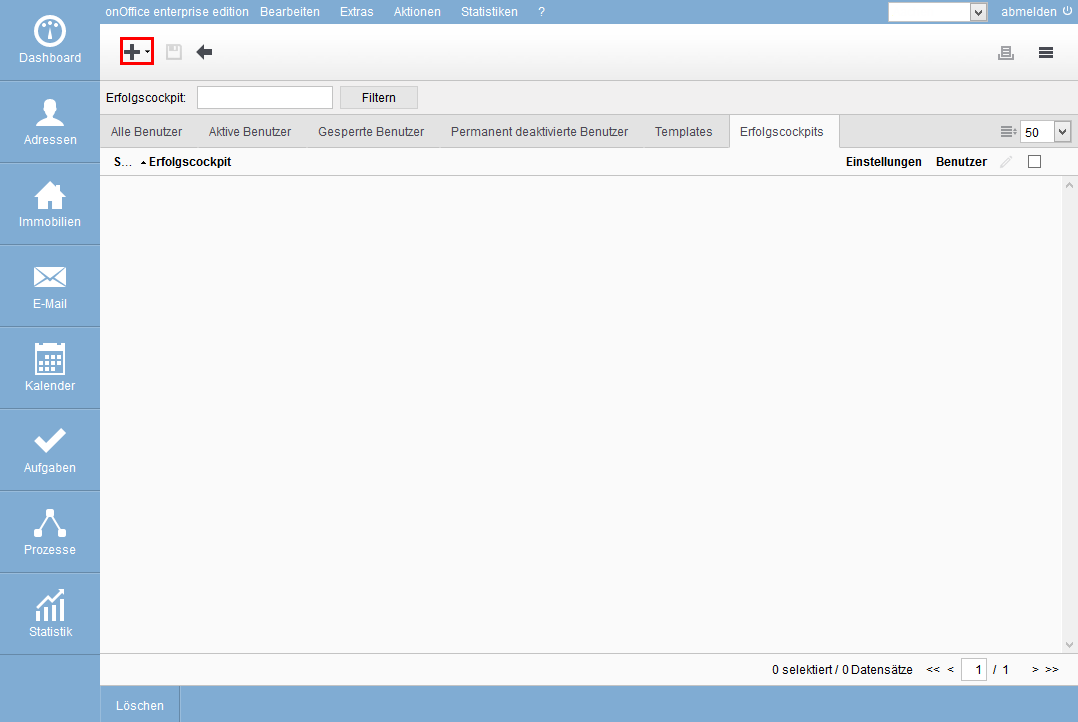
To create a Cockpit Template, go to the user settings under and click on the tab “Success Cockpit”. Here you can create a new success cockpit template. Click on the plus symbol ![]() .
.
Which destinations should be displayed in the cockpit?
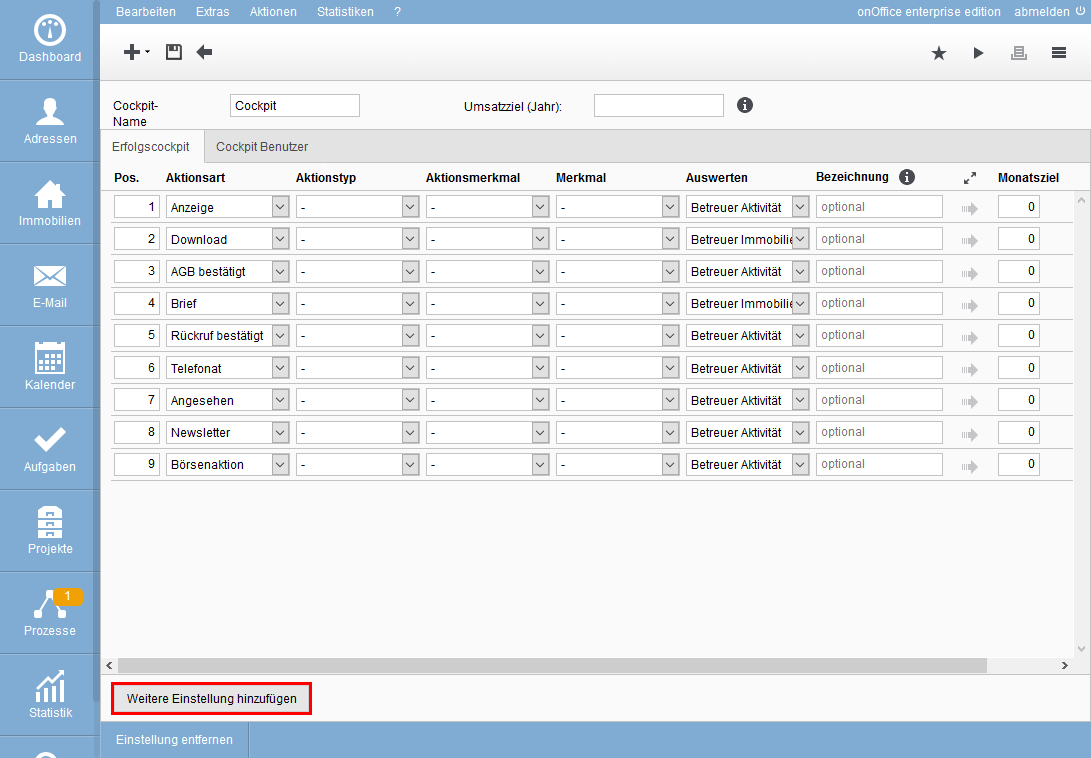
You can choose from all existing promotion types and differentiate between them using one or more promotion types. If you select several action types, all combinations of action type and the selected types are used for the evaluation.
In the field “Monthly target” you define the number of the respective combination per month. To enter different values per month, switch to the expert view above the double arrow ![]() . Using the single arrow in front of the individual monthly values, you can distribute a value over all months. It is also possible to enter decimal numbers to get an even value as annual target value.
. Using the single arrow in front of the individual monthly values, you can distribute a value over all months. It is also possible to enter decimal numbers to get an even value as annual target value.
You can delete settings by checking the setting to be deleted on the right and clicking “Remove setting” at the bottom of the action bar.
To save the Cockpit Template, click on the save button ![]() in the upper left corner.
in the upper left corner.
Special features
The selection of the action types takes place via a multiselect. For example, you can select all action types for an action type, which are then evaluated in the success cockpit.
Sales target (year)
Here you can define a sales target, which is used in the statistics module for the user ranking list.
Features
With the success cockpit you not only evaluate certain action types such as “telephone call”, but also certain characteristics that you can create yourself. For example, you use the characteristic “Owner contact”. You can then add this to appointments as well as to telephone calls etc. In the success cockpit, all activities/agents log entries with this characteristic are then counted, regardless of the action type (task, telephone call, email, letter, etc.) or the type of action.
Administrators create features by selecting , enter a content and switch the field to “Active”. For more information on creating MultiSelect fields, click here.
Evaluate according to
In the column ‘Evaluate’, you can specify what is to be evaluated. For normal activities such as email or letter, you can choose between supervisor activity or supervisor property.
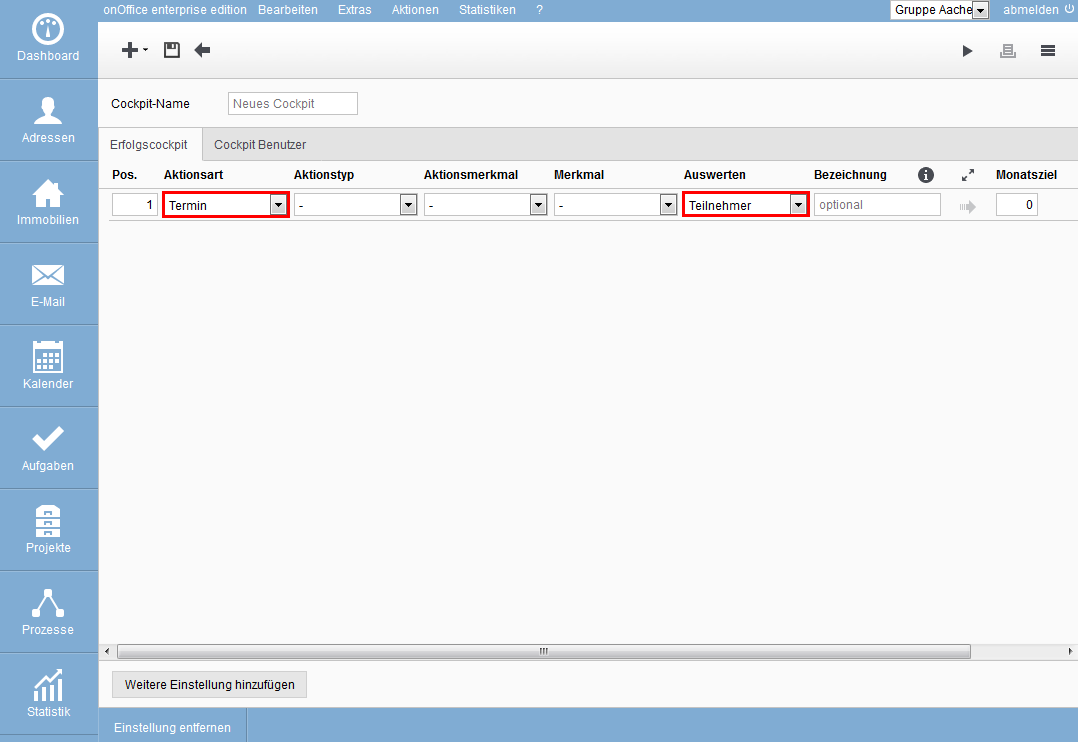
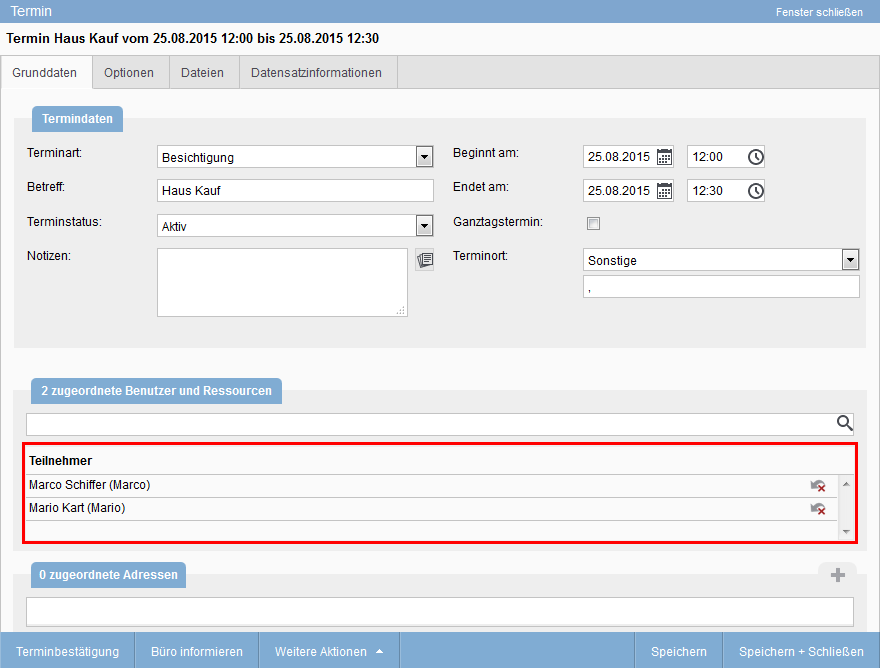
In addition, there is also an evaluation by participant for the activity type Date
- Supervisor activity: The supervisor of the activity is evaluated.
- Property manager: This evaluation only works for activities that also have a property linked to them. The manager of the linked property is evaluated.
Special feature dates
Appointments are counted differently in the success cockpit: either for the creator or the user. If the dates are evaluated for the creator, the date of creation is counted. In this case, no property or address link must exist. For the users, the appointment is counted only on the day on which it takes place. For users, a property or an address must always be linked so that the appointment is evaluated. Series dates are only counted once.
You can set in the cockpit whether the appointment is to be counted for the creator or the user.
You define the setting for whom the success cockpit evaluates the appointments in the settings of the respective success cockpit by choosing ‘Appointment’ as action type in the column ‘Evaluate’, whether the appointment should be evaluated for the creator or for the user linked to the appointment.