Entry
Entry Dashboard
 Contacts
 Properties
 Email
Email Calendar
 Tasks
Tasks Acquisition Cockpit
 Audit-proof mail archiving
 Automatic brochure dispatch
 Billing
 Groups
 Intranet
 Marketing Box
 Multi Property module
 Multilingual Module
 onOffice sync
 Presentation PDFs
 Process manager
 Project Management
 Property value analyses
 Enquiry Manager
 Showcase TV
 Smart site 2.0
 Statistic Tab
 Statistics toolbox
 Success Cockpit
 Time Tracking
 Address from clipboard
 Text block
 Customer communication
 External Tools
 Favorite links
 Calculating with formulas
 Mass update
 onOffice-MLS
 Portals
 Property import
 Quick Access
 Settings
 Templates
 Step by step
You are here: Home / Additional modules / onOffice sync / onOffice Sync via Z-Push

onOffice sync
onOffice Sync via Z-Push
Here we explain the setup, what is synchronized and what happens when data is deleted.
Establishment
Attention with active sync via memotoo:
If you are already using sync via memotoo, you must first switch it offon the smart phone, otherwise the appointments will be entered twice in the smart phone.
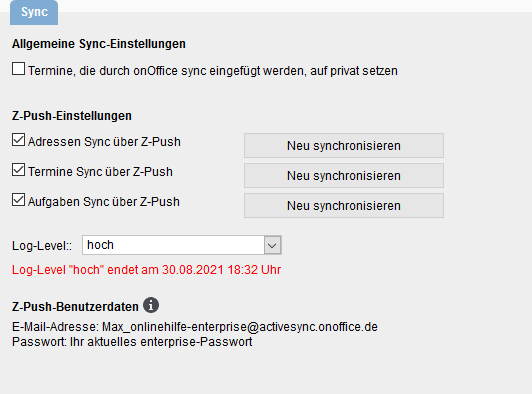
In all users for whom onOffice Sync is activated, you can define the user settings () the Sync can be activated via Z-Push.
If the checkboxes are not visible, please check in the user rights) whether the sync is allowed for this user.
If an active synchronization via memotoo is set up, it looks a little different, then you can switch the synchronization from Memotoo to Z-Push with the checkbox.
ATTENTION, a selection of the synchronization direction is only possible via Memotoo.
The Log Level setting can only be set by the user. This will log more data during the transfer to detect any errors during synchronization. The high log level is active for 7 days after power on.
The Z-Push user data is displayed as soon as addresses, appointments or tasks have been activated for sync via Z-Push. Please pay attention to the correct capitalization and
small letters in the Email address. If you change your enterprise password, then
you must also update access on the devices on which you use the
synchronization via Z-Push.
What is synchronized?
From onOffice addresses, appointments and tasks can be synchronized. Which data is synchronized can be specified per user in the user settings.
Dates
So that an appointment can be synchronized, you must be entered in onOffice as a user in the corresponding appointment. If your user is assigned to a group, onOffice will also recognize this as your appointment. Individual and serial appointments are synchronized. Special cases such as “Every 3rd Monday of the month” cannot be synchronized and are therefore ignored.
Tasks
You must be entered as an agent so that a task can be synchronized. Tasks are also displayed if you or your group are entered in the responsibility and no agent has been entered.
Contacts
To synchronize addresses, you need to share the address with onOffice Sync as usual. This is done via a checkbox in the address.
In addition, you have the option of specifying which telephone numbers and which Email addresses are to be synchronized. To do this, open the telephone numbers or Email addresses of the address and specify in the “Sync” column which field is to be occupied by the respective number/email.
Deleting data
The deletion of data is different depending on whether you delete data in a client or in onOffice enterprise edition. This is a security measure to avoid accidentally deleting data and links in onOffice.
Delete data in the client
If you e.g. delete an appointment in the smart phone, it will be set to “Cancelled” during the synchronization in onOffice enterprise edition – if you are the creator, otherwise you will be removed from the participant list.
If you delete a task, it is set to completed in onOffice enterprise edition.
Delete data in enterprise
If you delete data in onOffice enterprise edition, this is also deleted in all clients.
An Exchange account must be created on the smart phone. The synchronization takes place directly via the Exchange account.
A special Email address and password are entered when setting up the account. The rest of the setup is done automatically.
Before setting up the account on the smart phone, please make sure that the settings for the user in enterprise have already been made correctly.
The data is then accessed via a corresponding app (e.g. Google Calendar).
We explain the setup exemplary for Android version 10.
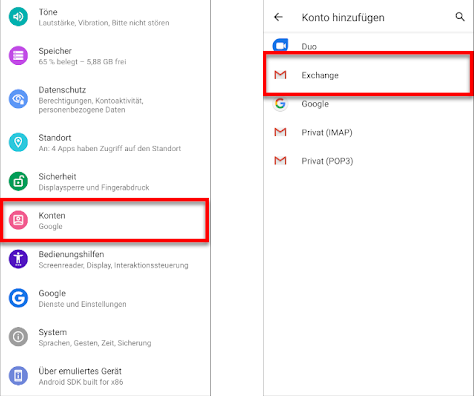
Add Exchange Account
Under (May vary from Android device to Android device)
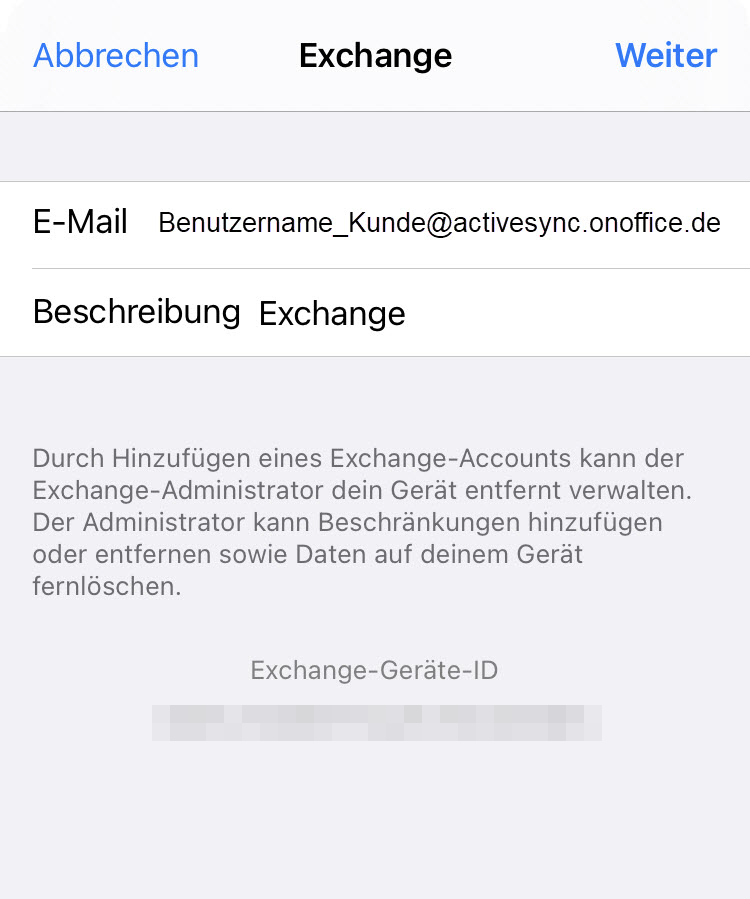
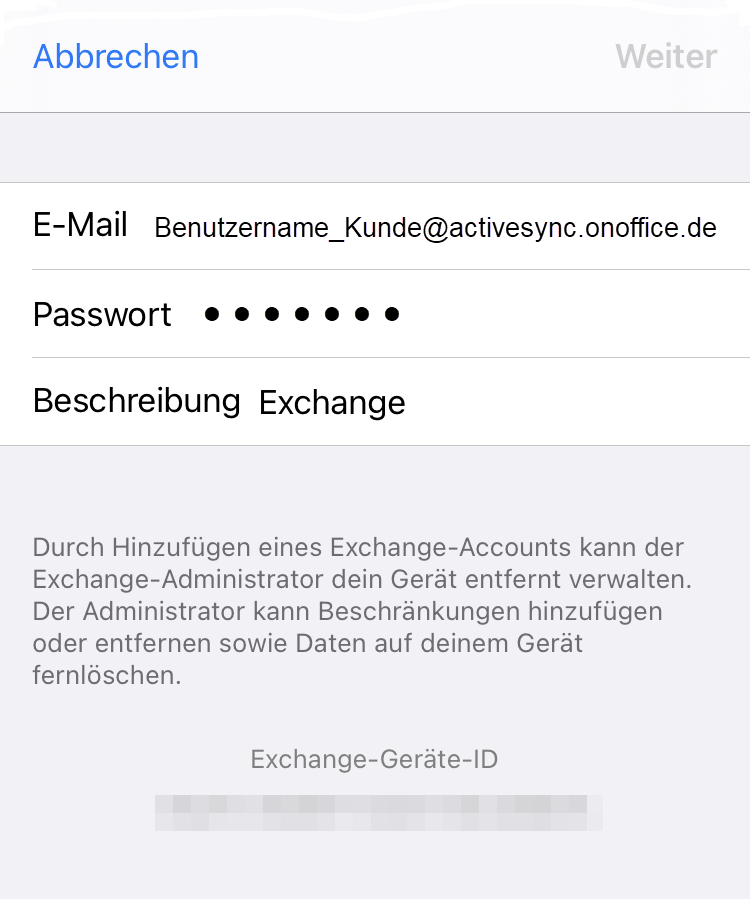
Enter email address and password
If sync is activated, you can view the required data in the user settings of the user under Z-Push user data .
A special address is entered as the email address, with which further configuration is carried out automatically: Benutzername_Kundenname@activesync.onoffice.de
This is not one of their email addresses and you must always enter“@activesync.onoffice.de“.
Names are case-sensitive.
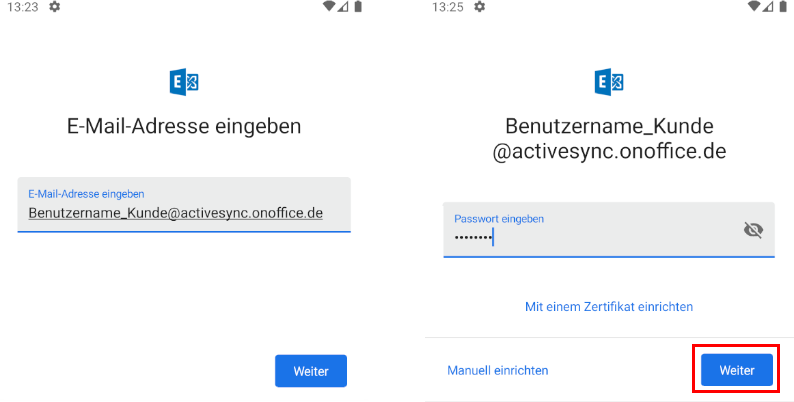
The password is the normal onOffice password of the user.
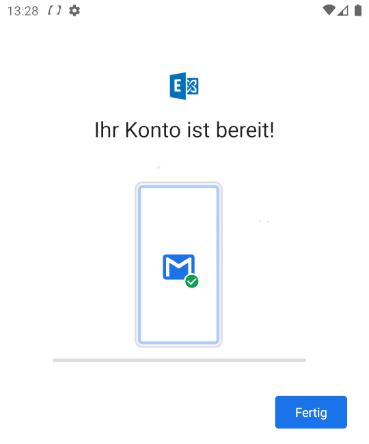
After entering the password, please click on “Next”, the rest is done automatically.
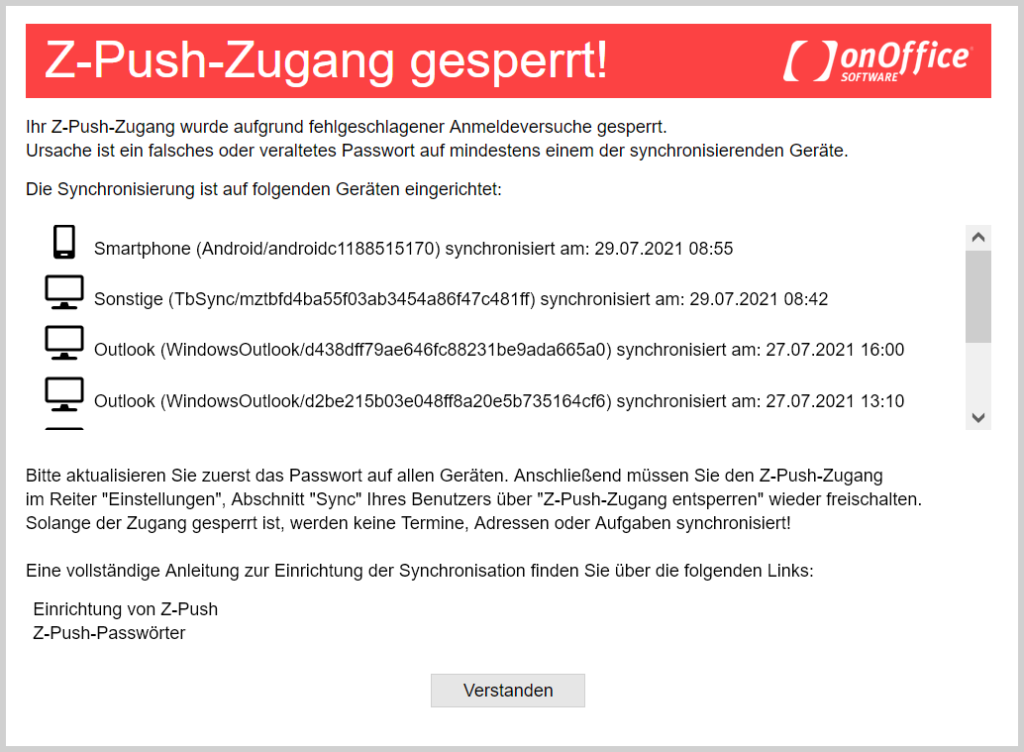
If the access does not work, it may also be because the wrong password was entered too often and the Z-Push account was locked in Enterprise.
You can check this in the user settings () of Enterprise and, if necessary, unlock yourself.
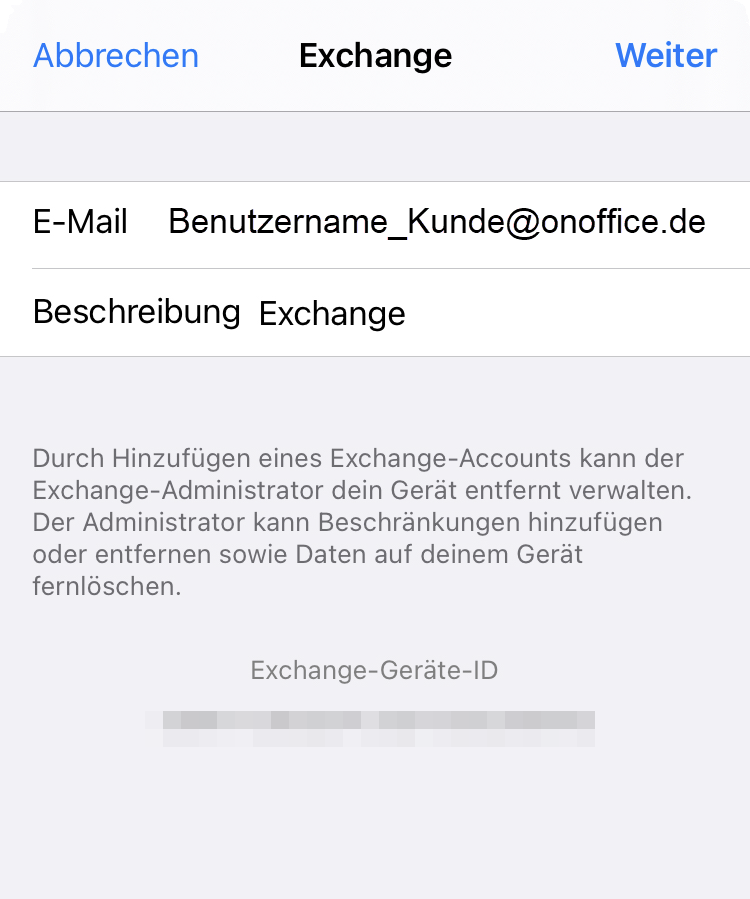
If the automatic does not work, the data must be entered manually, the steps after “Add Exchange Account” will change.
Enter email address and password
Please enter as email address: Benutzername_Mandantenname@onoffice.de
Important, you must always enter “@onoffice.de”, because the server for the synchronization belongs to onOffice.
With the names the upper and lower case is important !!
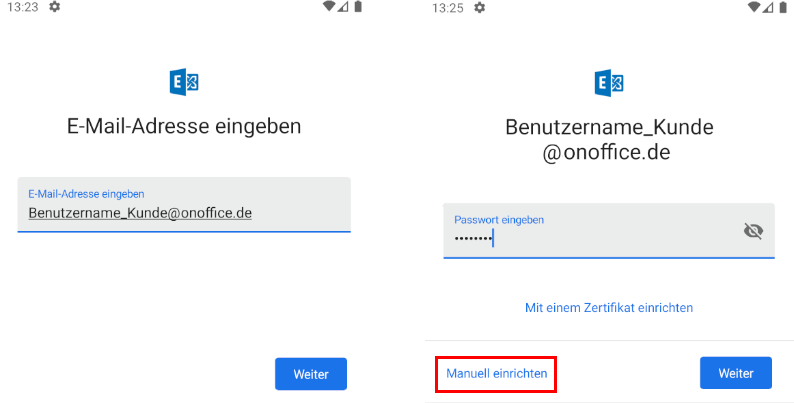
The password is the normal onOffice password of the user.
After entering the password please click on“Set up manually“.
Server settings
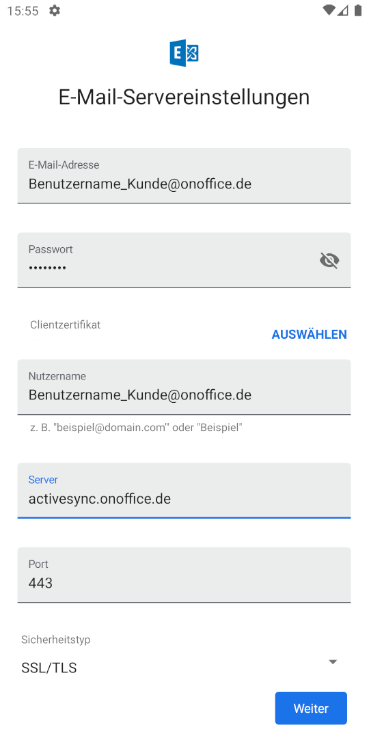
In the view “Email Server Settings” the server must be set: activesync.onoffice.de
After clicking on “Next” the account is completely set up.
Here too, please pay attention to upper and lower case.
First synchronization
The first synchronization may take some time.
Please note that emails are not synchronized.
Please check the synchronization interval, frequent synchronization can increase the required data volume and the battery load.
Where are my appointments?
The synchronized appointments can be found as usual in the calendar app. Either the appointments are already visible or you still have to make a selection – here using Google Calendar as an example:

Important note for Android 11
In Android 11 the notification system has been revised.
When configuring the notifications for Calendar App, the background synchronization is adjusted at the same time. If you turn off the notifications for the calendar app, appointments can no longer be synchronized or synchronization must be triggered manually.
Depending on the app used, only a selection of the fields from onOffice is displayed and vice versa.
Where are my duties?
On Android you have to use a third party app that supports Microsoft ActiveSync to display the tasks, e.g. the app “Tasks & Notes”.
Depending on the app you are using, you may need to create a separate account “Exchange” for the task sync. Please refer to the documentation of the relevant app.
Depending on the app used, only a selection of the fields from onOffice is displayed and vice versa.
Where are my addresses?
The synchronized addresses can be found as usual in Contacts. If you can’t find your synced addresses there, the Google Contacts app can be set up, and the contacts can be displayed there depending on the account.
Depending on the app used, only a selection of the fields from onOffice is displayed and vice versa.
Set up Exchange account
Under
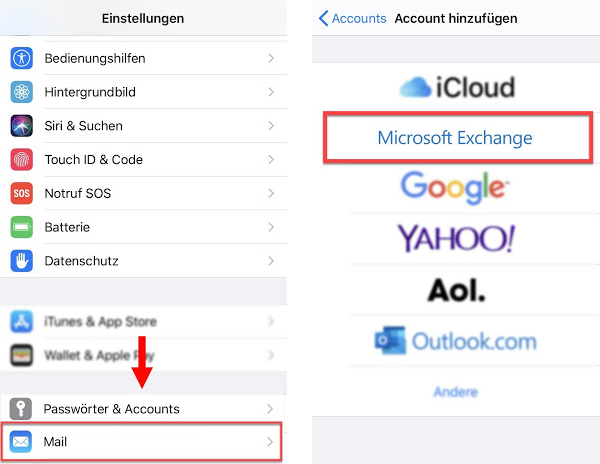
Image obsolete.
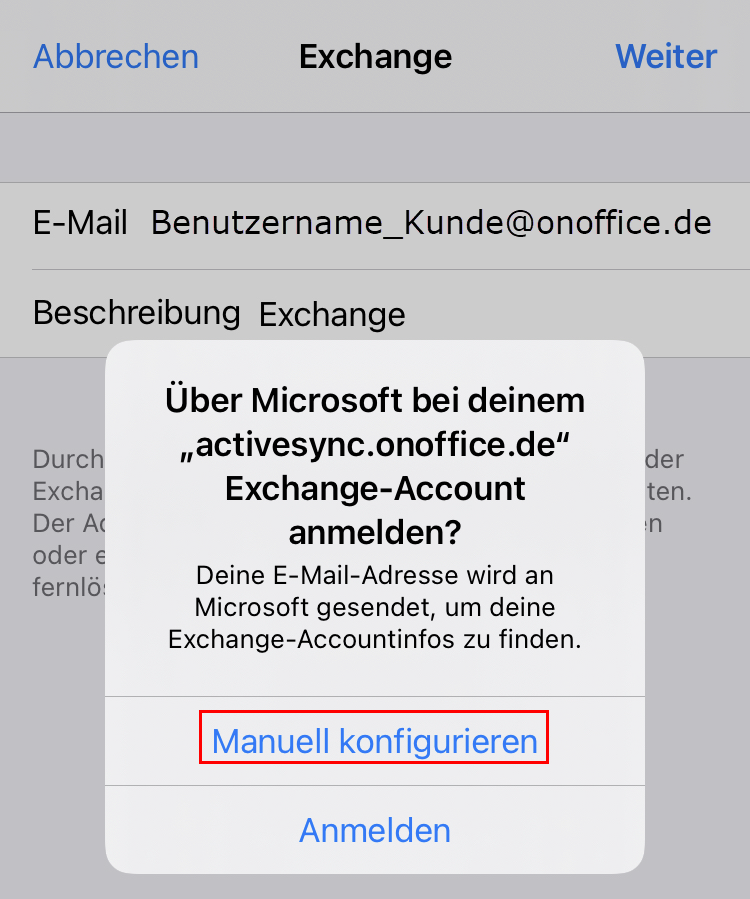
Enter email address and password
A special address is entered as the email address, with which further configuration is carried out automatically: Benutzername_Kundenname@activesync.onoffice.de
This is not one of your email addresses and“@activesync.onoffice.de” must always be entered.
Capital and small letters are important !!
With “Next” a query appears, please click on “Log in”.

You will be asked for the password, which is the normal onOffice password of the user.
If the access does not work, it may also be because the wrong password was entered too often and the Z-Push account was locked in Enterprise.
You can check this in the user settings) of Enterprise and unblock it yourself if necessary.
If the automatic does not work, the data must be entered manually, the steps after “Add Exchange Account” will change.
Enter your email address
Please enter as email address: Benutzername_Mandantenname@onoffice.de
Important, you must always enter “@onoffice.de”, because the server for the synchronization belongs to onOffice.
Capital and small letters are important !!
In the following query, please click on “Configure manually”.
Enter password
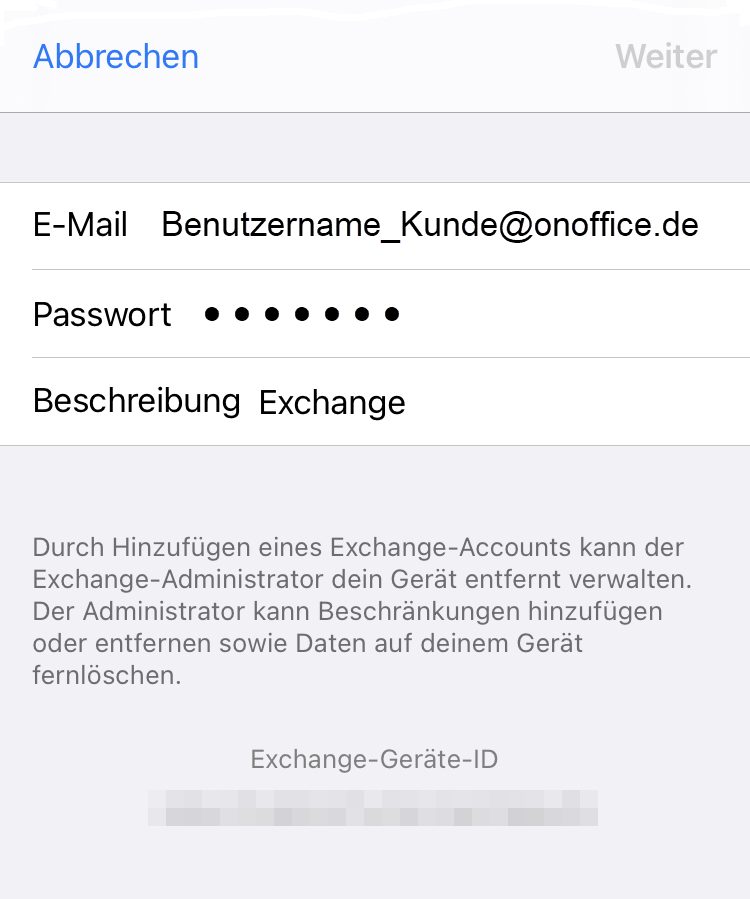
The password is the normal onOffice password of the user.
After entering the password please click on“Next“.
Server settings
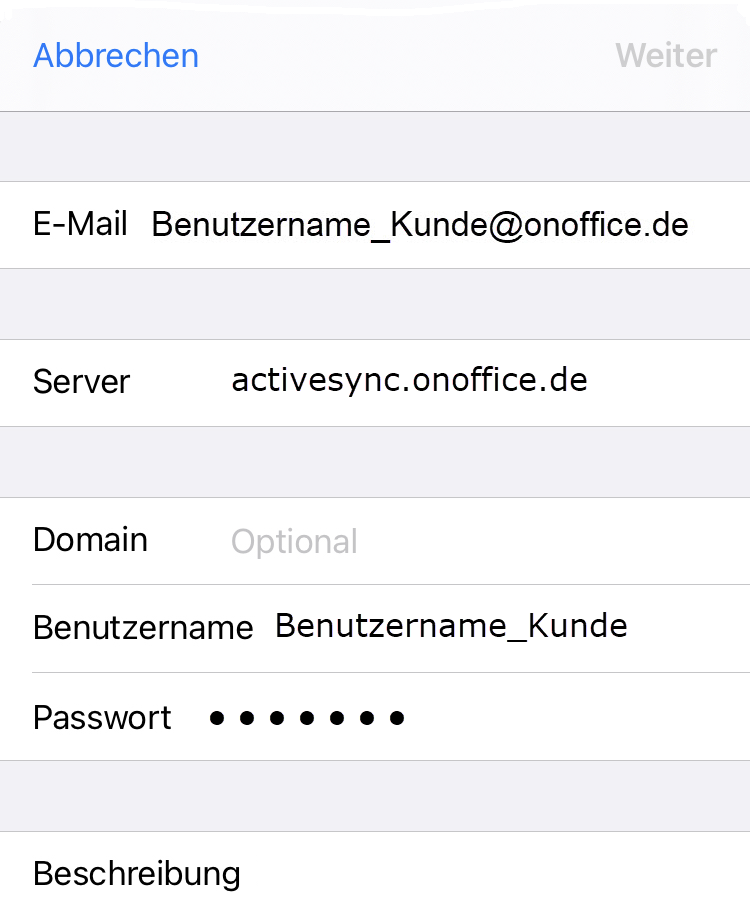
In the view Server Settings the following server must be set: activesync.onoffice.de
Please enter Username_Mandant as user name
H I N W E I S: Please check again the email (must be Username_Mandant@onoffice.de) and the user name (must be Username_Mandant)!
First synchronization
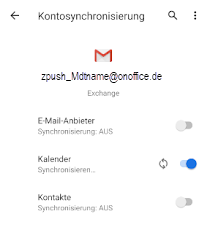
After the setup you have to define what should be synchronized.
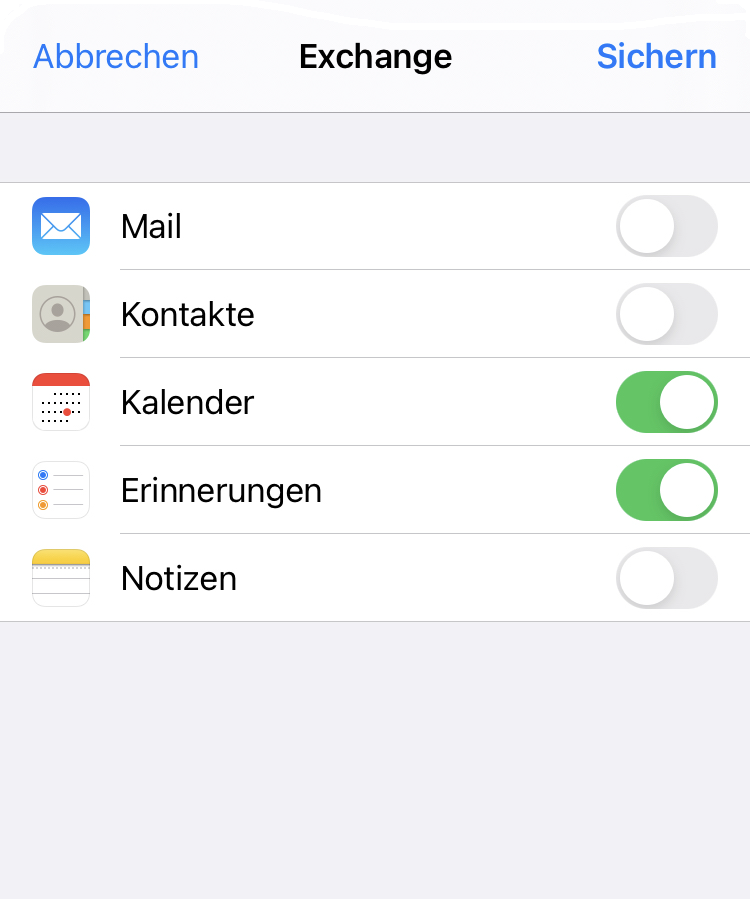
Note, emails are not synchronized.
The first synchronization may take some time.
Please“Save” the configuration so that the sync account is created.
Where are my appointments?
The synchronized appointments can be found as usual in the calendar app. Either the appointments are already visible or you still have to make a selection – here is an example
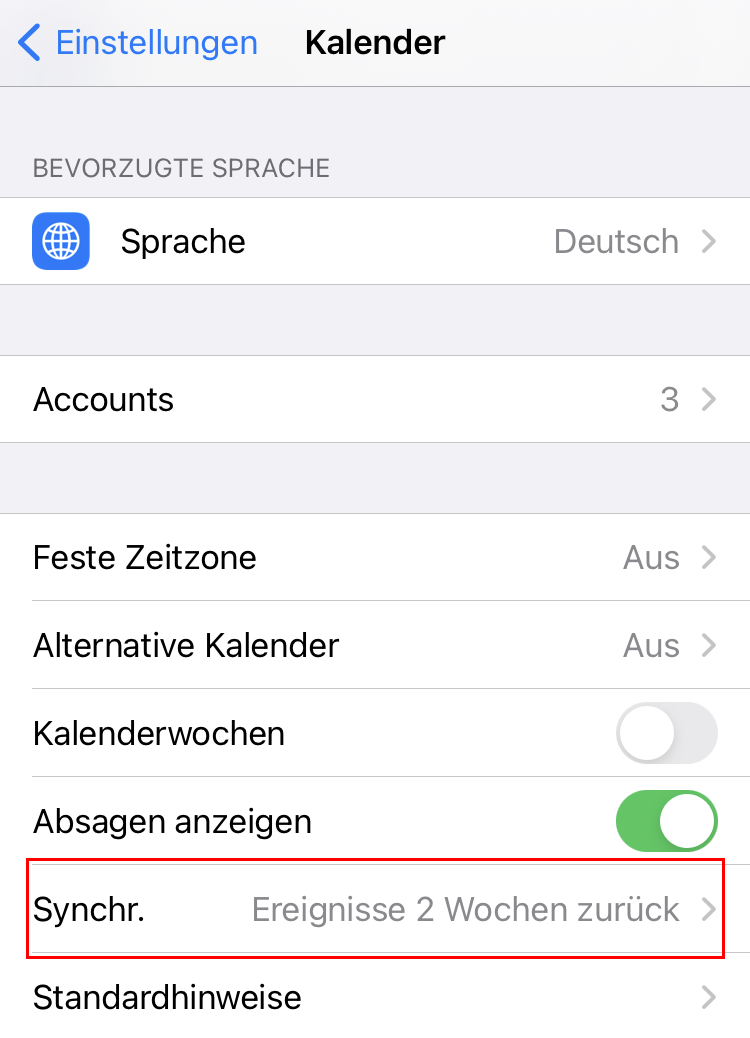
If appointments are missing, please limit the synchronization period in the calendar settings). This sounds contradictory at first, the number of transferred appointments is limited to 500 and over the shorter synchronization period fewer appointments are transferred and thus the limit is bypassed.
Attention, this setting is done in the configuration of the calendar and applies to all calendars.
Resources can be displayed, adding is only possible in onOffice enterprise.
Depending on the app used, only a selection of the fields from onOffice is displayed and vice versa.
Where are my duties?
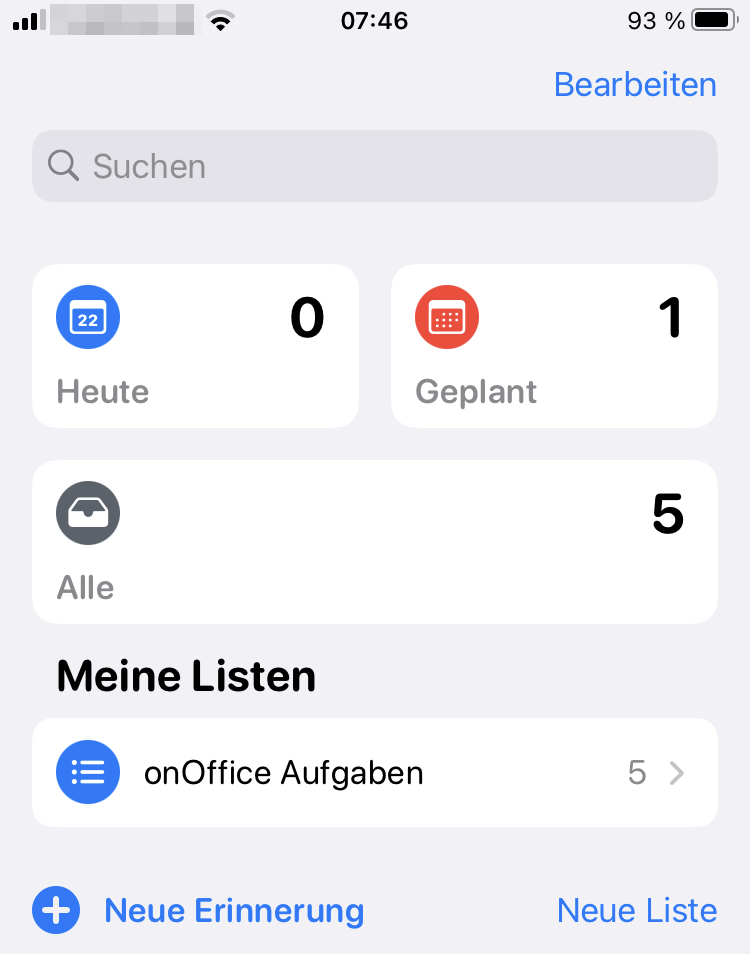
The synchronized tasks are displayed in the reminders, where an “onOffice tasks” list is created.
Depending on the app used, only a selection of the fields from onOffice is displayed and vice versa.
Where are my addresses?
You can find the synchronised addresses as usual in the Contacts app. You may need to make the synchronised addresses visible via “Groups”.
Depending on the app used, only a selection of the fields from onOffice is displayed and vice versa.
Exchange Activesync is offered in many places as an account type, often a synchronization via Z-Push is then possible.
As an example we describe here the connection to Microsoft Outlook, including all necessary data for the configuration, with which you can also try it in other places.
Attention with active sync via memotoo:
If you are already using sync via memotoo, you must first switch it off in Outlook, otherwise the appointments will be entered twice.
Create account
Important note:
The automatic setup of an Exchange account with Z-Push in Outlook is not possible. To enable the manual setup of an Exchange ActiveSync access in Microsoft Outlook, the following view must be called in Outlook: File >> Account Settings >> Manage Profiles.
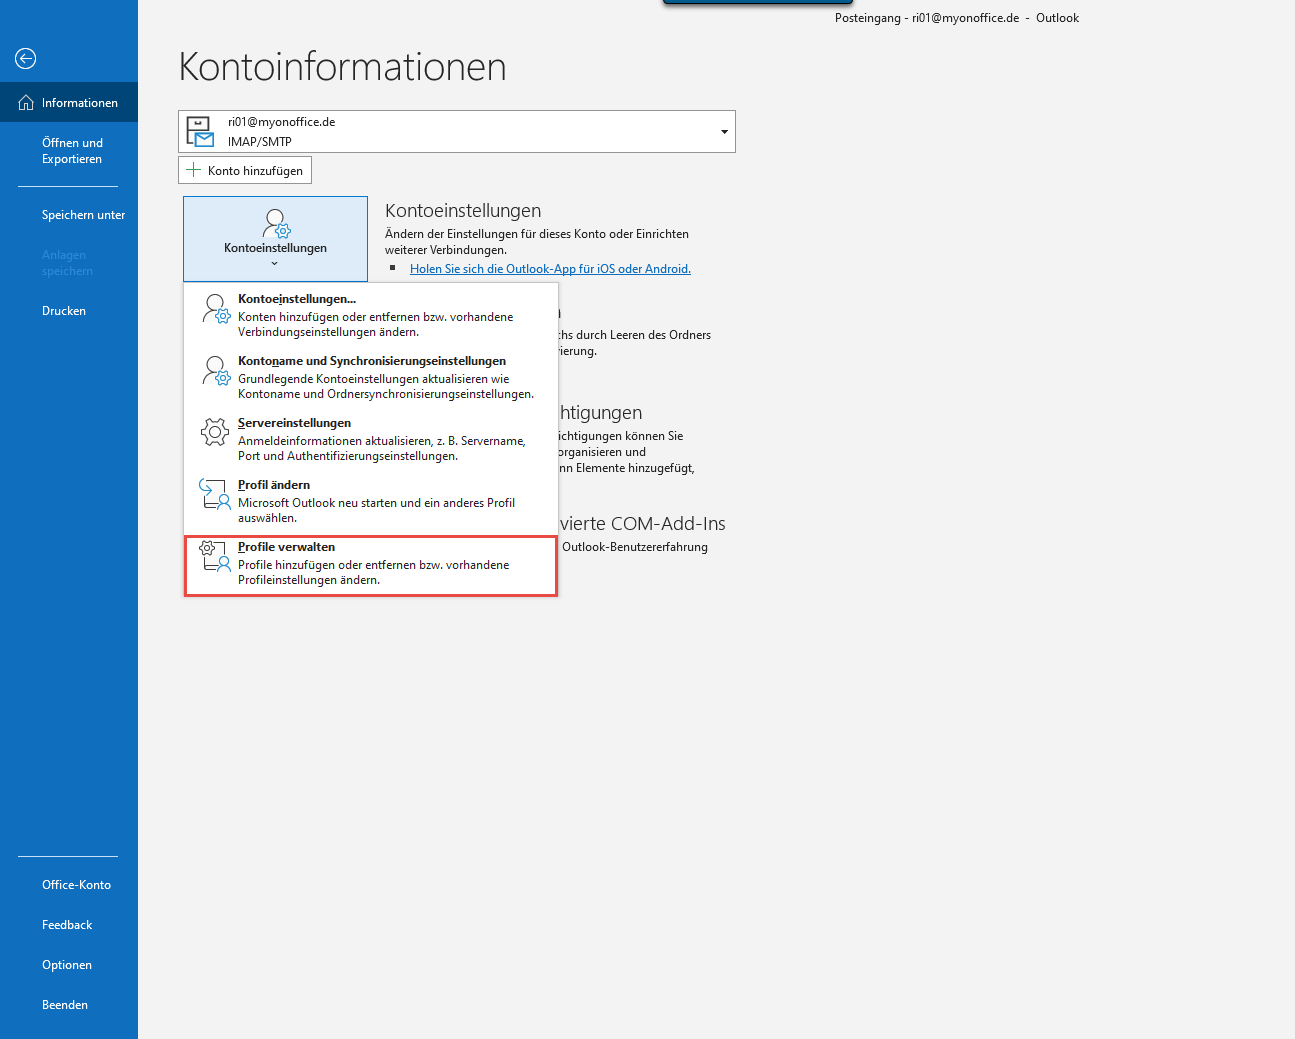
This opens the older account management dialog. Clicking on Email Accounts. .. opens the view to the account settings. Via New. .. you can add a new account.

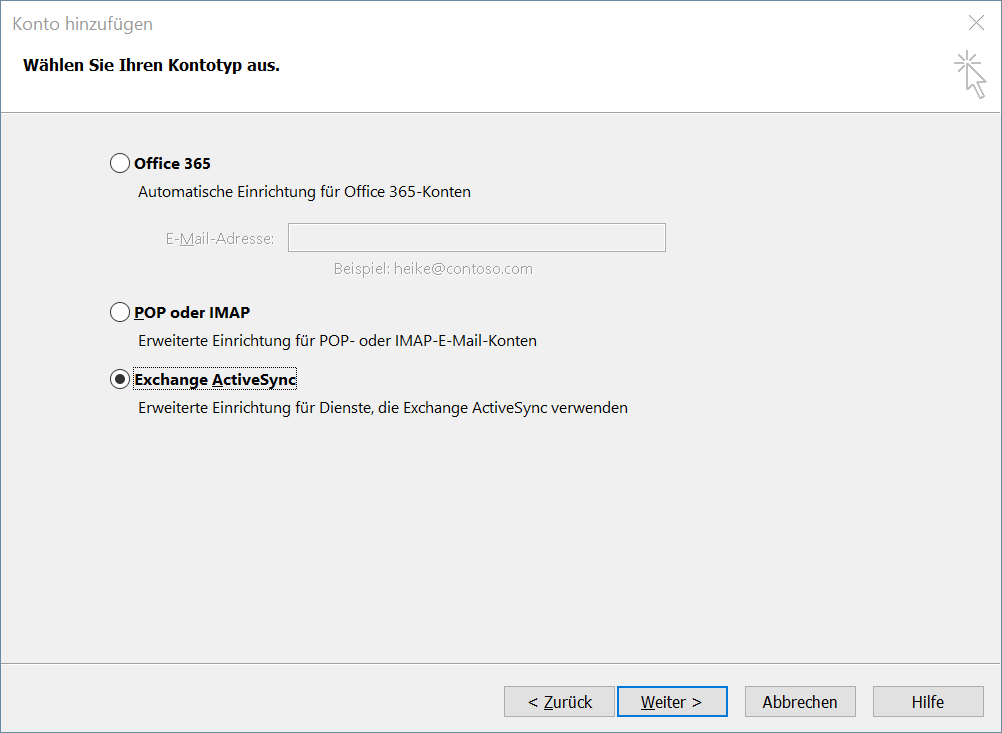
In the “Add account” view, then select Manual configuration or Additional server types .
The setup can then be done manually via Exchange ActiveSync .
User information
Please enter your user as name: User
Please enter as email address: Benutzer_Kundenname@activesync.onoffice.de
Important, it must always be entered “@activesync.onoffice.de”, because the server for the synchronization belongs to onOffice. Customer name means the onOffice client name.
Capital and small letters are important !!
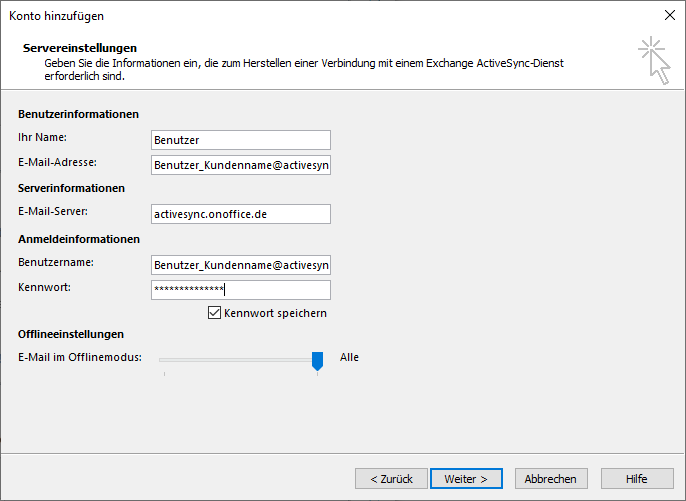
Server information
As server please enter: activesync.onoffice.de
Capital and small letters are important !!
Login information
Please enter as username: Benutzer_Kundenname@activesync.onoffice.de
As password please enter the password of the user from enterprise.
Capital and small letters are important !!
Outlook now checks the access to the server
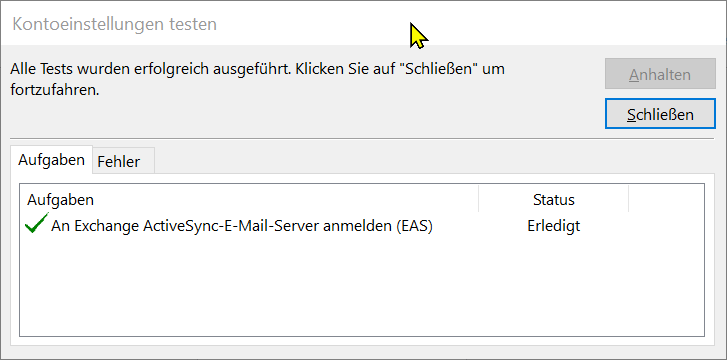
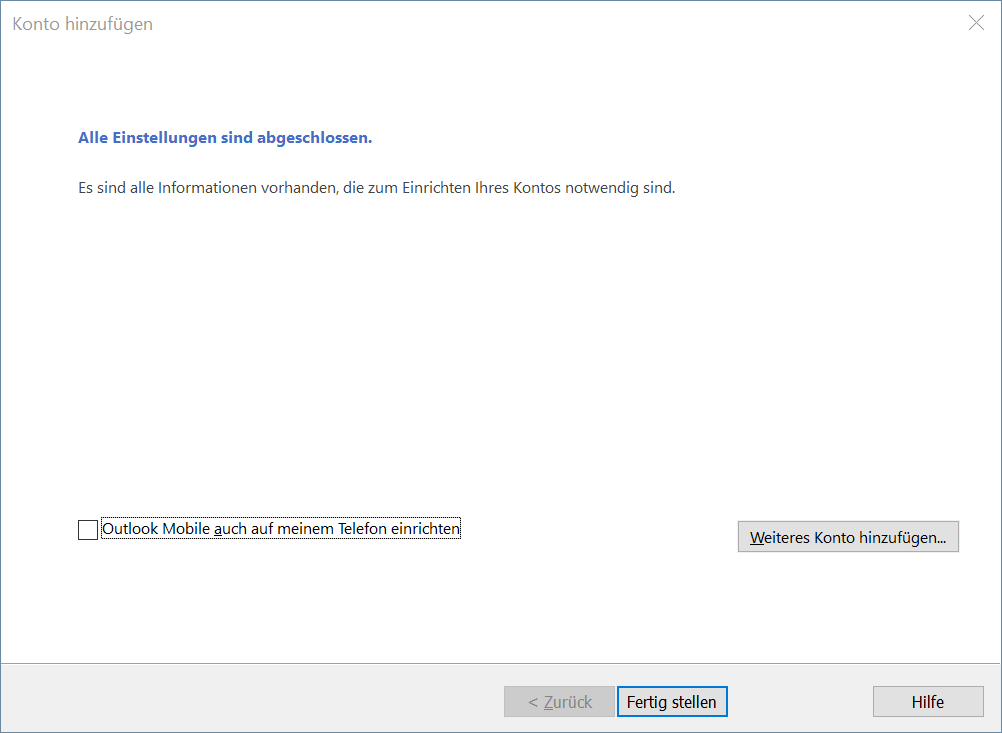
After checking the connection, click on “Finish” to finish setting up the account!
If the access does not work, it may also be because the wrong password was entered too often and the Z-Push account was locked in Enterprise.
You can check this in the user settings () of Enterprise and, if necessary, unlock yourself.
Where are my appointments?
Reminder To synchronize appointments, the option must be activated in the user settings.
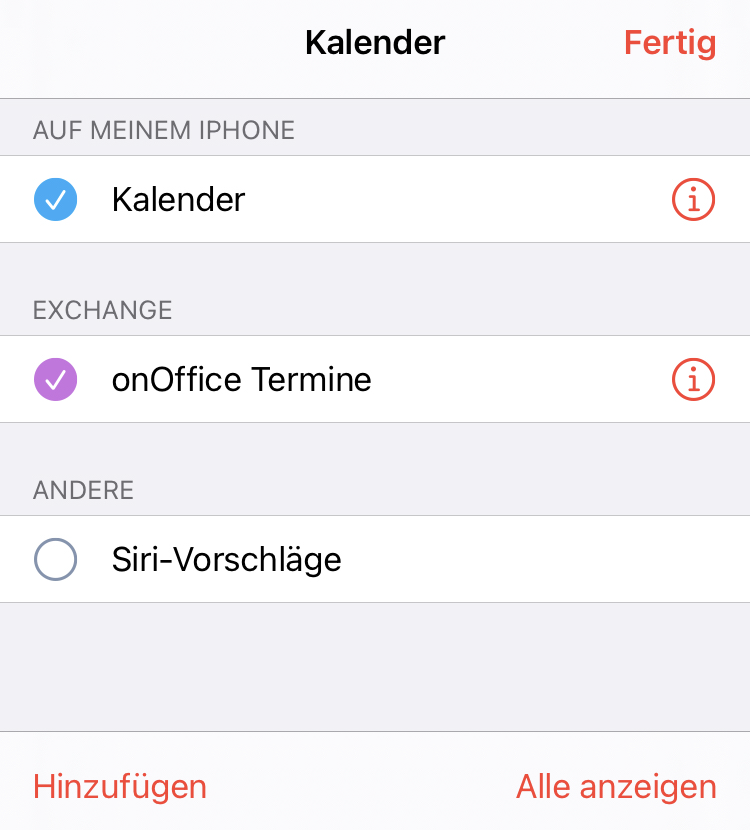
In order to see the synchronized appointments, a check mark must be set for the appropriate calendar.
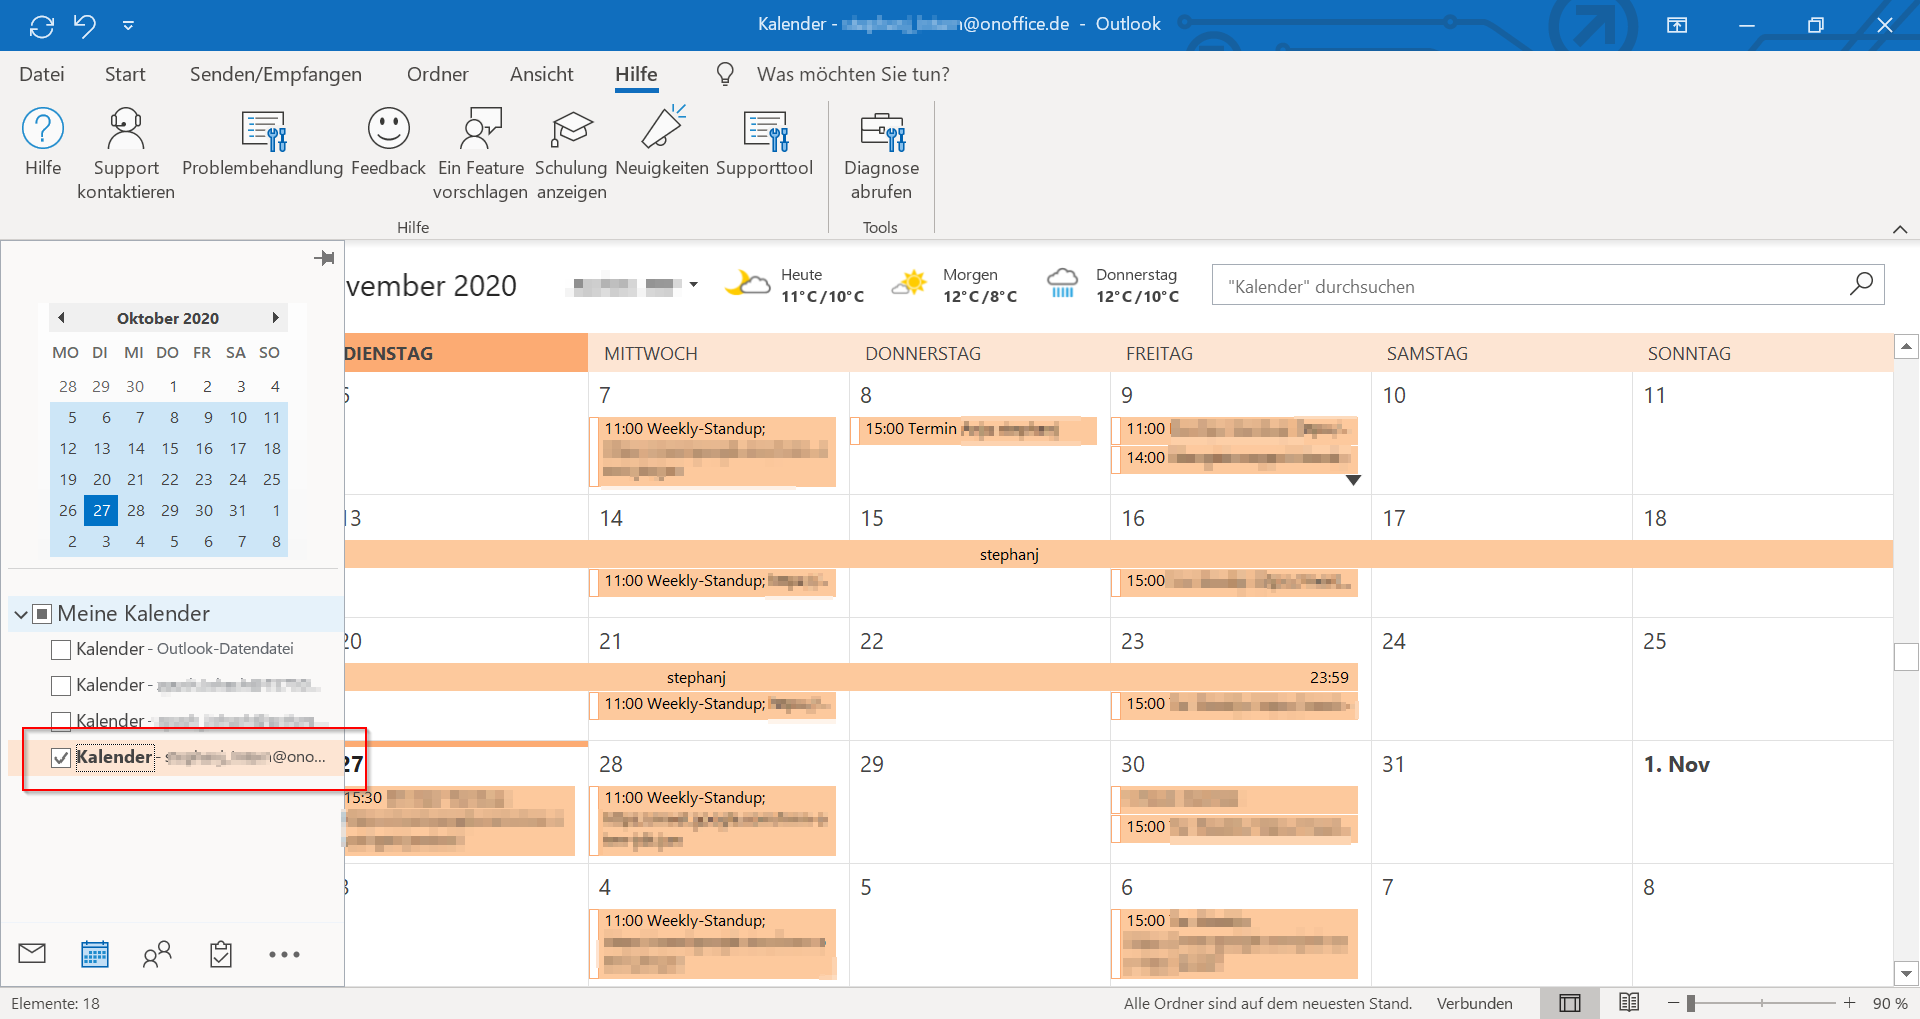
The dates should then appear in the calendar bit by bit.
Where are my duties?
Reminder To synchronize tasks, the option must be enabled in the user settings.
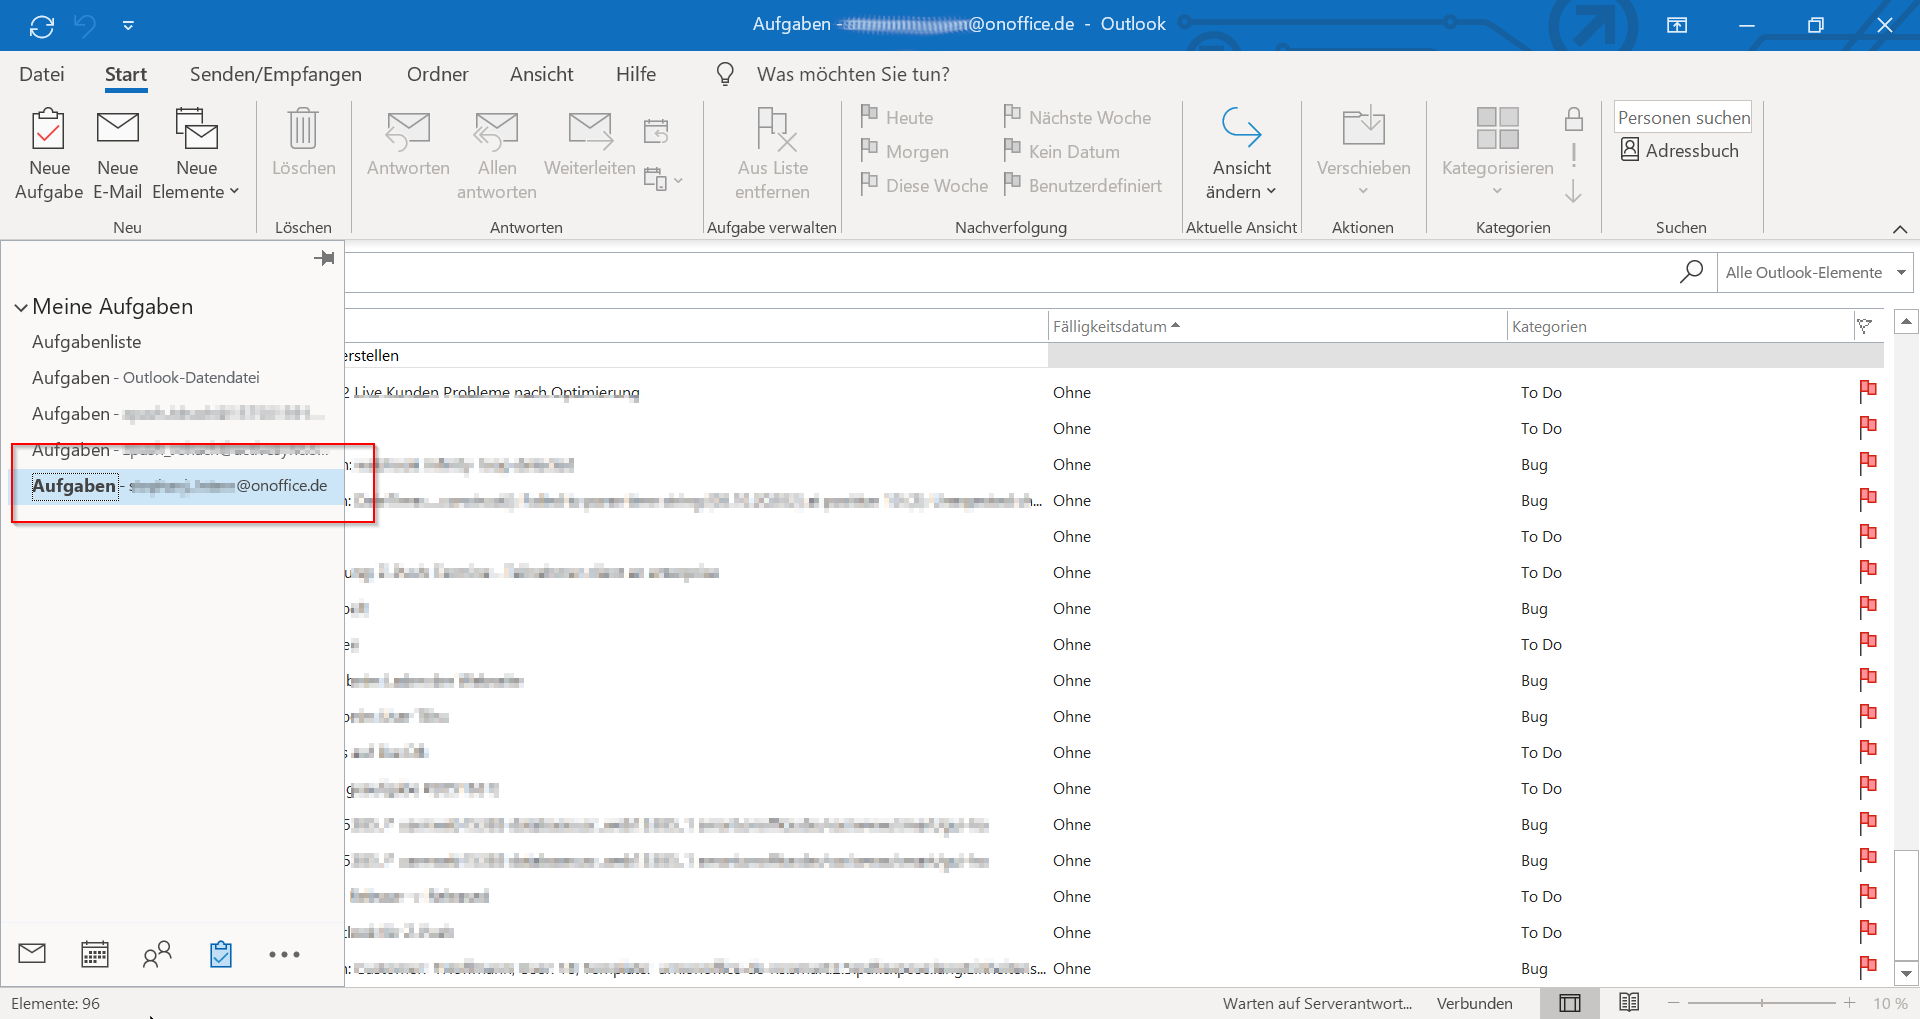
To see the synchronized tasks, the Z-Push account must be selected in “My Tasks” on the left.
Outlook reports that synchronization is not possible due to incorrect credentials
Possibly you have reassigned the password in enterprise. If the old access data is still stored in Outlook, synchronization will not work because of incorrect access data. You can then do the following:
- Change the password on all (!) smart phones connected via this user and in Outlook
-
If the access does not work, it may also be because the wrong password was entered too often and the Z-Push account was locked in Enterprise.
You can check this in the user settings () of Enterprise and, if necessary, unlock yourself.
Appointments from other Outlook calendars
Please do not copy any existing calendars from your client (such as Outlook) to Enterprise via Z-Push.
If many new entries usually have to be created, there is often a delay in the sync when the copied appointments are created in Enterprise, which is seen as an “error” by clients (especially Outlook), so that these appointments are sent again (and possibly several times) as “new” from the client to Enterprise.
This can result in the unintentional multiplication of appointments from the client.
If you want to import appointments from other calendars into Enterprise, please ask for information about alternative calendar import options.
Restrictions
In this section, we discuss unsupported functionality and limitations.
No Email dispatch from appointments
Sending emails via Z-Push is not supported. This means that some calendar apps cannot send invitations or appointment updates via mail if the ActiveSync protocol is used for this purpose. This restriction may also apply to other functionalities that involve the sending of Emails.
Exchange Server
For synchronization, Z-Push uses the ActiveSync protocol for mobile devices. Some clients, e.g. Outlook under MacOS, do not support this protocol. Unfortunately, synchronization is not possible with these clients.
Deadline limits
Currently, a maximum of 500 appointments can be synchronized. If the client does not specify a time period, only appointments that are at most one month in the past will be synced. We synchronize upcoming appointments up to 6 months into the future.
Attention: There may be other limitations imposed by the client.
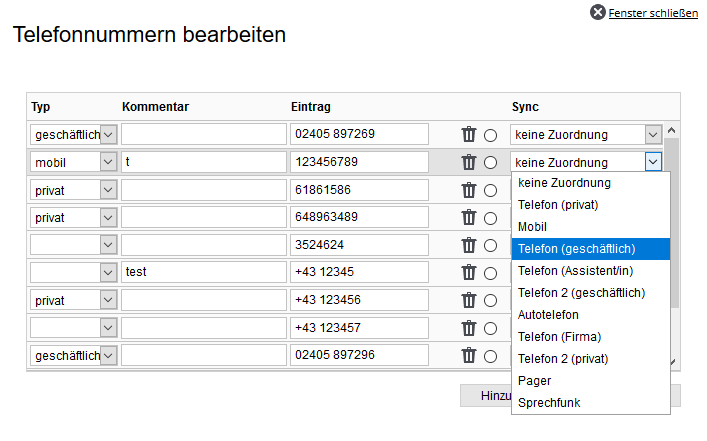
Telephone numbers, fax numbers and Email addresses
If an address is released for synchronization, a field can be defined in the pop-up for the telephone numbers (analogous to fax numbers and Emails) for assignment during synchronization. Z-Push supports various fields, which are then displayed accordingly on the client. The screenshot shows the selection options for phone numbers.
Notice: Each selection can only be made once. If an assignment is used again, the number that previously had this assignment is reset to “no assignment”.
The selection in the “Sync” column is completely independent of the type you selected in the first column.
If you change a phone number on the smartphone, this number is stored in onOffice enterprise as
new number and entered with the corresponding assignment for the synchronization.
The old number remains in onOffice enterprise, but is no longer synchronized.
If you delete a phone number on your smartphone, it will NOT be deleted when synchronizing in onOffice
enterprise, but only removed from the synchronization.
Notice: In an address on the smartphone, delete all phone numbers (or fax numbers
or Email addresses), the fallback behavior is triggered again during the next synchronization of onOffice enterprise, since no more assignments are known. The current default number
is transferred back to the client, unless you have specified new phone numbers for synchronization
. If you really want to delete these numbers, this must be done in onOffice enterprise.
Appointment sync restrictions (unsupported appointment types)
There are certain limitations when synchronizing appointments, as some mobile devices and
support Outlook appointment options that are not available in enterprise.
The following appointment types (no claim to completeness, as client functionality can change):
- Series appointments with defined weekdays
- Series dates according to the pattern (e.g. every x. Tuesday in the month)
If incompatible appointments are entered via a terminal device, an appointment is created, but this may result in undesired discrepancies.
For a clean sync to onOffice, only appointments should be created in the clients that can also be created in this form in enterprise.