You are here: Home / Modules / Email / Read email

Read email
Read emails
Unread emails are shown in bold in the email list.
By clicking on a list entry, a preview of the selected email appears below or next to it – depending on the view setting / . Double-click to open the email in full-screen view and the email list is hidden. Use the back arrow at the top left to return to the old view.
You can also open the email in a new tab. To do this, hover over the email and click “Open in new tab”.
The arrow symbol next to the recipient shows further information about the email. Click on the Info-i in the tile to find the spam level, the result of the virus check and other technical details.
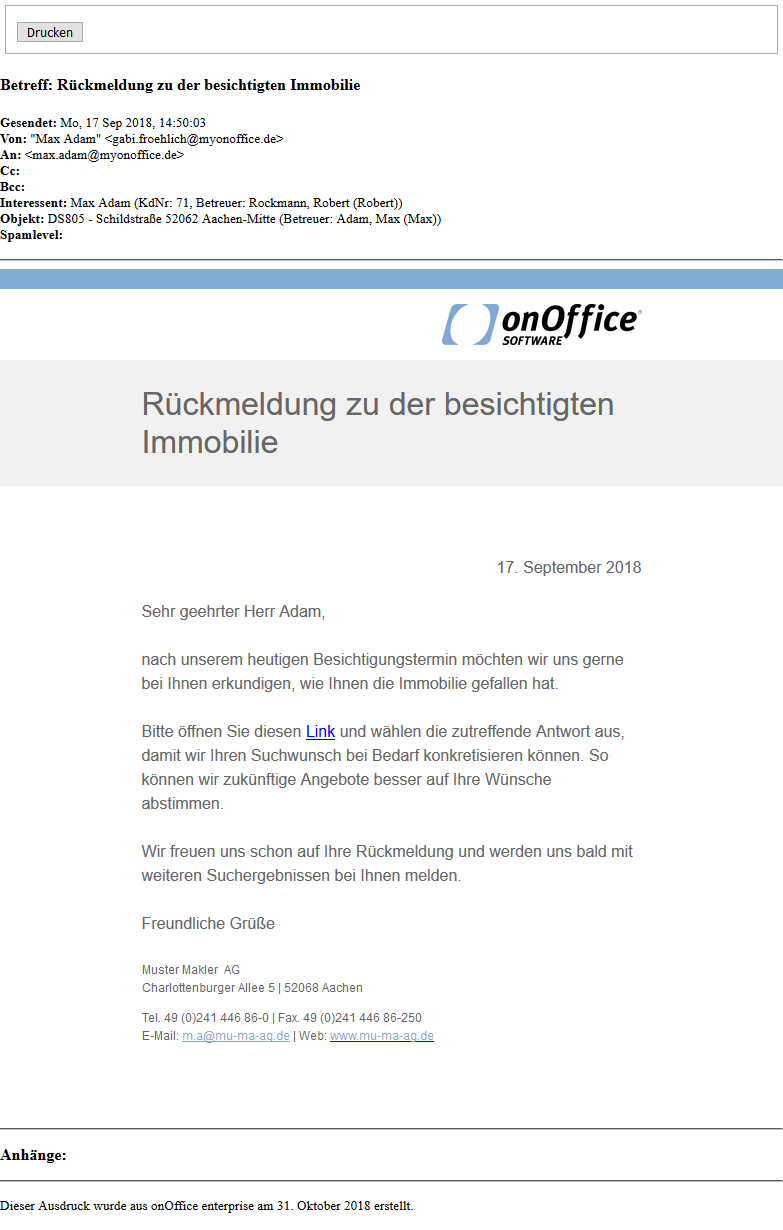
Print emails
To print an email, open the corresponding email and then click on the print icon in the toolbar . If there are attachments to this email, the respective title is also output.
In the print view, you will also see the linked supervisor in the address and property data record.
Assign address or property data records
Information can be found under Assign email.
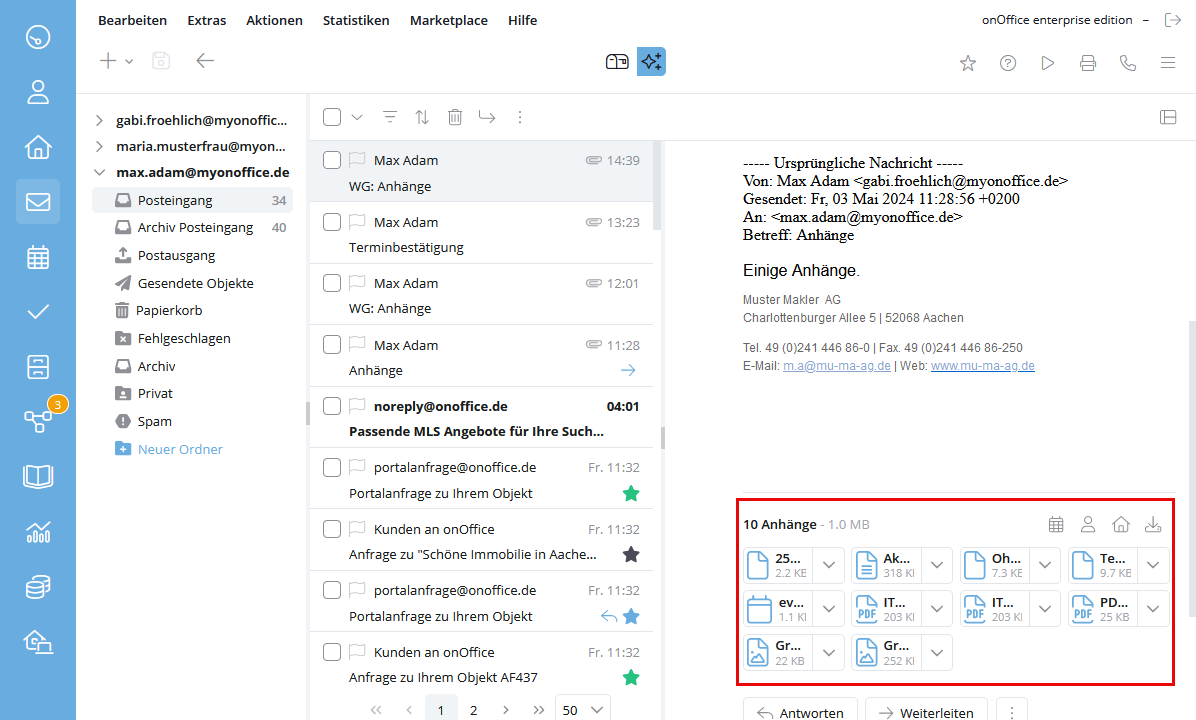
Attachments
File attachments to emails can be found at the end of an email. The attachments are listed individually. To go directly to the attachments, click on the paper clip next to the date of receipt in the email header.
To download the email including attachments, click on the three-dot menu in the email header and then on the “Save email” entry
Functions for email attachments
You can see the functions of the email attachments at the top right in the attachments area. You can download a ZIP file of all attachments via . If you have activated the setting “Provide email with attachments for download” on the Other tab of the basic settings, the email is also provided to you together with the attachments for download via “Save email”.
In addition to downloading the files to your hard disk, you can also store them collectively in the linked property or addresses. The corresponding buttons / appear as soon as data records are assigned to the email. If you only want to save individual files in a data record, select the corresponding data record next to the respective file via .
Appointments or business cards that you receive by email can be easily imported into onOffice enterprise. If appointment files are attached to the email, click on “Import appointment ‘file name'” or on the tile itself .
For business cards with the extension .vcf, click on the tile with to create a new address data record.
The appointment window opens for an appointment. The email addresses of the participants in the file are compared with the users and then with the addresses. Matching people will be added to the appointment. The system does not import serial appointments or appointment reminders.
The “Create address” dialog opens for business cards. The information from the file is entered in the corresponding fields. You can check this data and change it if necessary.
You can download appointments and business cards as usual by clicking on the attachment.
External mailbox notification
If you have changed the password for an external mailbox but have not updated it under Tools >> Settings >> Basic settings >> email >> External IMAP mailboxes , you will see a corresponding message when you open the mailbox in the Mail module.

 Introduction
 Dashboard
 Addresses
 Properties
 Email
Email Calender
 Tasks
Tasks Acquisition Cockpit
 Audit-proof mail archiving
 Automatic brochure distribution
 Billing
 Groups
 Intranet
 Marketing box
 Multi Property module
 Multilingual Module
 onOffice sync
 Presentation PDFs
 Process manager
 Project management
 Property value analyses
 Request manager
 Showcase TV
 Smart site 2.0
 Statistic Tab
 Statistics toolbox
 Success cockpit
 Time recording
 Address from clipboard
 Boilerplates
 Customer communication
 External Tools
 Favorite links
 Formulas and calculating
 Mass update
 onOffice-MLS
 Portals
 Property import
 Quick Access
 Settings
 Templates
 Step by step
