 Entry
Entry Dashboard
 Contacts
 Properties
 Email
Email Calendar
 Tasks
Tasks Acquisition Cockpit
 Audit-proof mail archiving
 Automatic brochure dispatch
 Billing
 Groups
 Intranet
 Marketing Box
 Multi Property module
 Multilingual Module
 onOffice sync
 Presentation PDFs
 Process manager
 Project Management
 Property value analyses
 Enquiry Manager
 Showcase TV
 Smart site 2.0
 Statistic Tab
 Statistics toolbox
 Success Cockpit
 Time Tracking
 Address from clipboard
 Text block
 Customer communication
 External Tools
 Favorite links
 Calculating with formulas
 Mass update
 onOffice-MLS
 Portals
 Property import
 Quick Access
 Settings
 Templates
 Step by step
You are here: Home / Extras / Templates / PDFdesigner / Create PDF brochure / Basic settings of this PDF brochure

Templates
Basic settings of this PDF brochure

You can make individual adjustments to the individual pages / elements, e.g. specify how big the difference to the standard size should be for the font sizes.
The basic layout was set at the very beginning with the choice of a template during creation. The pages and their elements can be additionally customized. In the corresponding places you will find the layout pattern icon ![]() and you can choose from the different variants in it.
and you can choose from the different variants in it.
We recommend using the CI colors from the basic settings . If another color is desired, please deactivate the checkbox and then select your desired color via the color selection ![]() .
.
To save the settings, click the save icon in the upper left corner ![]() .
.
The individual options of the basic settings are listed below.
In this field you enter the name of the brochure as an attachment, e.g. with email. Special features of this field are that you can also use property macros for the output of the file name. Functional macros are macros from the property address.
Examples: _strasse,_hausnummer,_ort
This is how the file name is formed from the street, house number and location. Please note that the address release will be taken into account. If parts of the file name are not generated, check the address release on the “Marketing” tab
In the Category field you can specify what kind of brochure it is. The values available for selection are:
- Posting: can be called up from the property list. Several properties can be linked via this. You then generate a preview via the “Brochure” button.
- Brochure template: corresponds to the standard. You can find this template as usual in the property details view and the “Èxposes” button.
- Brochure template with prospect: uses one or more address link(s) or property link(s). To do this, select any interested parties in the Interested parties tab and then the “PDF” button (next to “agent’s log entry”, “Consultation level”, … etc.) the desired template – or analogously in the property search tab one or more properties.
With “Short” or “Long” you define which images, floor plans and site plans are to be displayed. In the Files tab of a property, you can specify for each file individually whether you want todisplay “short” or “long” brochures.
This sets the color for bars, frames, separating elements. We recommend using the CI colors from the basic settings , in this case that would be the “main color”.
The basic font and its layout are set for the synopsis. There are Office comparable fonts available, you can open a PDF with examples via the link “Show font examples”. An often used font is e.g. Arial, which is represented in PDFdesigner by Tex Gyre Heros.
To upload a background graphic, first click “Browse…”, then select the appropriate graphic in the following window and click “Open”. After that, the file name will appear behind the “Browse” button. Then click on “Upload” and the file appears in the basic settings of the brochure.
By clicking on “+ Continue background graphic” you can store up to 12 different background graphics. One of them can then be selected on the individual pages. The graphics should be uploaded in DIN A4 format.
You can also deposit images with individual headers and footers.
Select whether a logo should be displayed. You can upload a logo, otherwise it will be taken from your basic settings. If you are in a group, the logo is taken from the group settings of the corresponding group.
You can determine the dimensions and the position of the logo.
The individual distances to the edges can be set here. These are specified in millimeters, which can also be stored as decimal numbers for the most accurate specifications.
Here you can set the size, color and alignment of the headings.
In this area you can set the size, color and alignment of the text.
You can allow the use of the footer here. Only if the checkbox is set, the footer settings per page will be respected. The configuration of the footer is fixed here for the entire brochure.
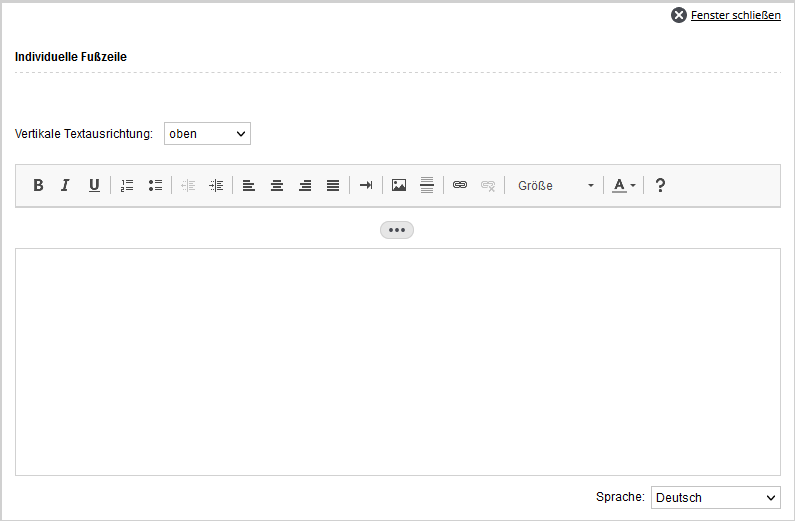
Custom footer
Custom footer is an option where you can design your own footer. To do this, click on the text “individual footer”, it opens the lightbox shown below.
Here you have the possibility to create individual areas and fill them with targeted content and / or macros. You can define footers for different languages using the language selector at the bottom right. The language in the brochure is based on the language of the interested parties.
Please note that if you use the individual footer, you have the option to specify an individual footer per page type. To do this, use the Advanced Settings of the respective page type.
This option allows you to specify whether an individual header is displayed on the pages of the brochure. Clicking Edit opens a lightbox for editing, just like the footer. Using the language selector at the bottom right, you can define headers for
different languages. The language in the brochure is based on the language of the interested parties
.

Here you can define individual distances of the header and footer to the page margin.
Under Other you can set the ‘Ignore price on request’ setting. If this option is enabled and “Price on request” is active in the property, the price will be displayed anyway.
If you activate the setting “Images in higher quality”, then – if available – original images will be included in the brochure.
Via the setting “PDF with reduced file size” the PDF can be created compressed.
This setting can only be activated after it has also been activated in the basic settings of enterprise.


