You are here: Home / Extras / Settings / Administration / Regions

Settings
Regions
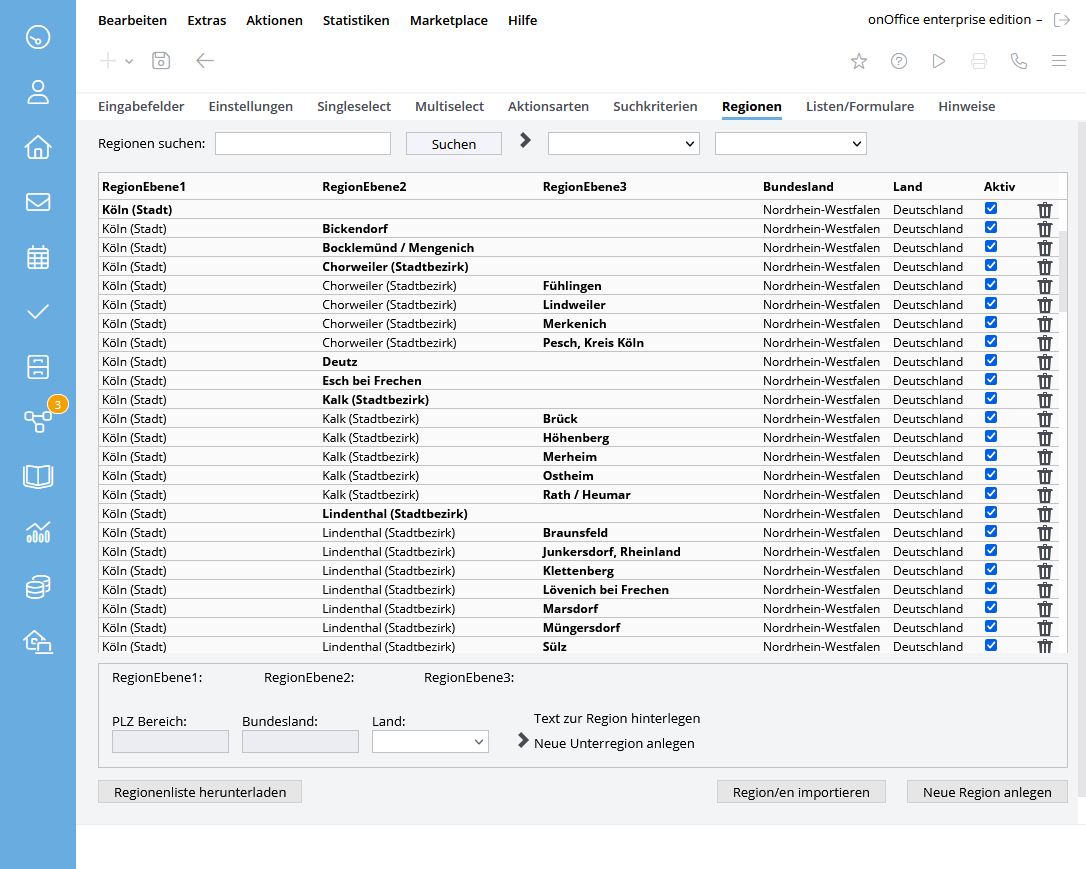
In order for a geographical assignment of interested parties and properties to be possible, the details of the town and zip code are often not sufficient. onOffice works here with “regional additions”.
You first create a structure of the regions in which you market your properties. The property is assigned a precise position within this structure. The interested party can select any number of regions in his search criteria, so that an allocation on a geographical level is possible.
Create new region
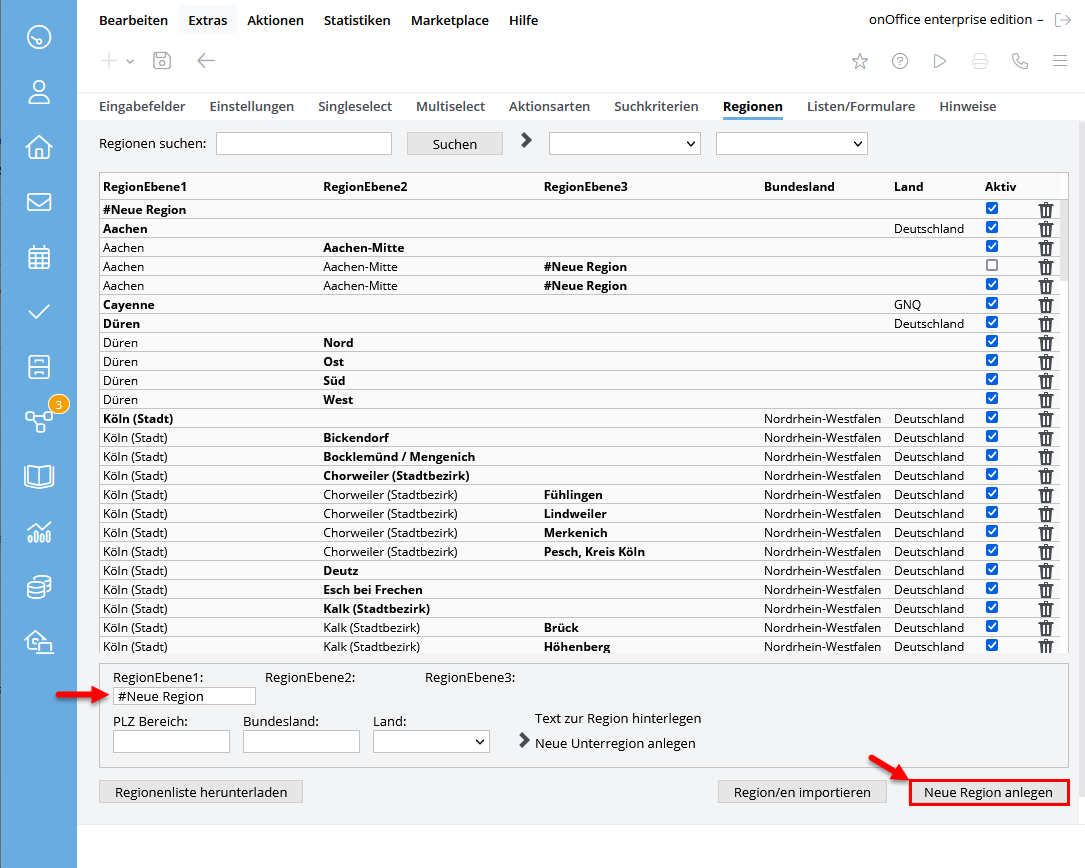
If you would like to create a new main region (as in the Aachen example), click on the “Create new region” button. A new line will appear under the heading “Region”, which you can edit to your desired region. Then save your entry.
All regions entered here automatically appear there in the category “regional addition” in the “Property management”).
Create sub-regions
You also have the option of defining sub-regions for your main regions. You can specify either districts such as Aachen-Mitte, Aachen-West etc. or zip code areas as search criteria.
Districts
- Select your main region. It then appears at the bottom left under the heading “Region level 1”.
- Select the “Create new sub-region” function
- Select the newly created level under your main region (by clicking on it). Now enter the sub-region “RegionLevel2” (e.g. district).
- Save your entry
- To create another region, proceed as described for level 2.
Zip code area
If you now define a postcode range for the region entered, this will be taken into account when the search criteria are run. This means that if you have not entered a town in a property, but only the zip code, this will be compared with the zip code area entered.
Country
For a further assignment, you can select the country from the corresponding drop-down menu.
The countries available for selection can be selected in the administration under Extras >> Settings >> Administration >> Singleselect >> Module: property management >> Key field: Land activated.
Download list of regions
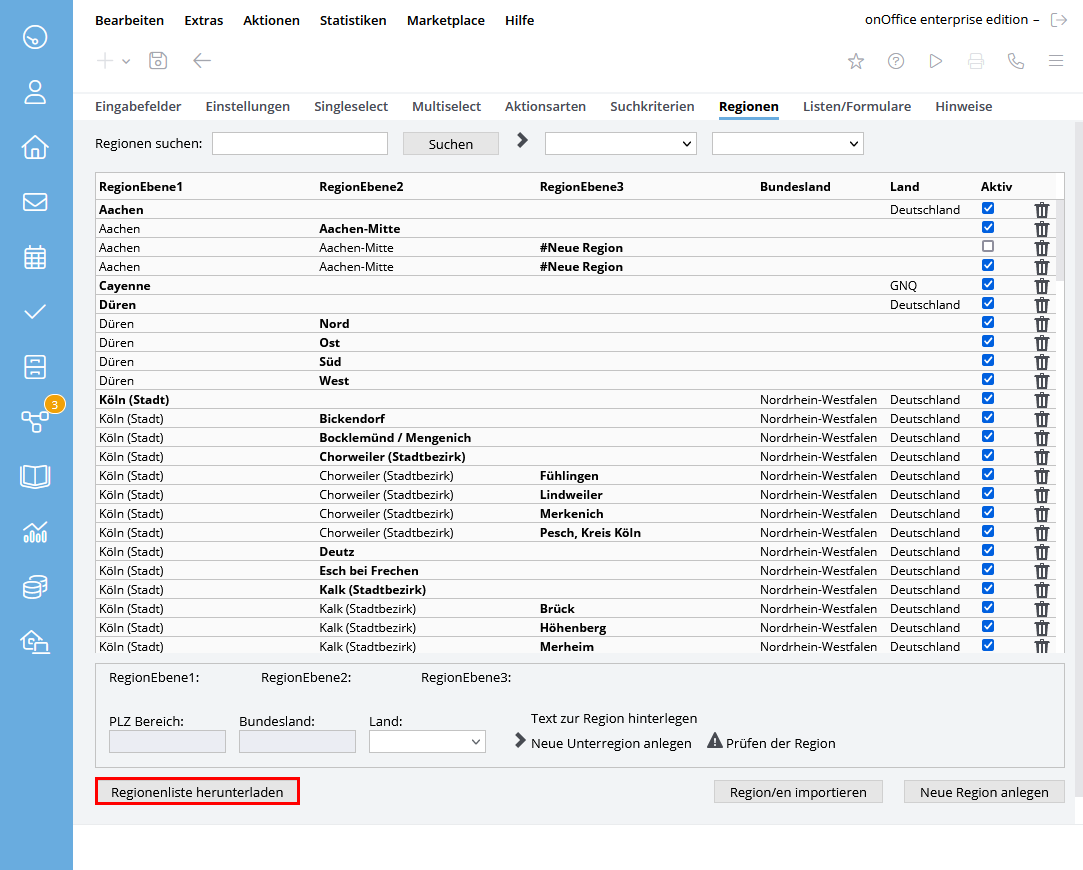
You can download all your regions using the ‘Download region list’ button. A CSV file is generated, which is filled with the columns “Name”; “Level”; “Value”; “State”; “Country”. The Value column can be used to convert regions, for example.
Notice:
Regions can be converted in the export list and uploaded to your onOffice enterprise version by onOffice Support with the changed values.
Import region/s
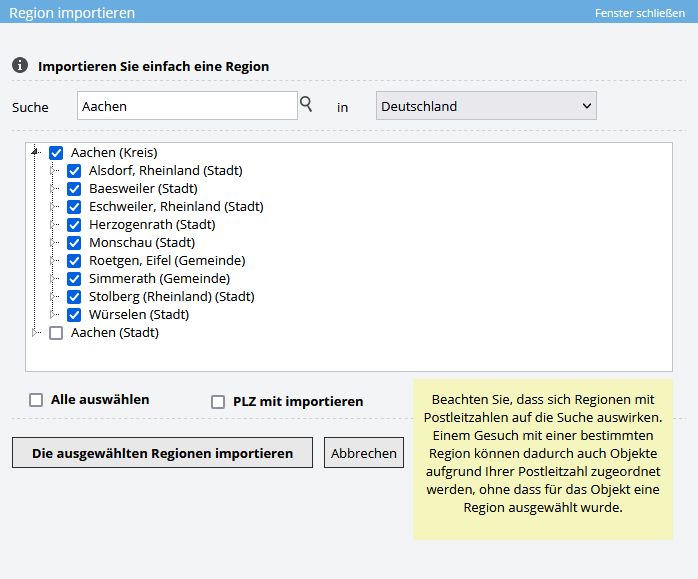
You can use the “Import region/s” button to search for a specific region and then import it directly into the software. Once you have clicked on the button, a pop-up window will open.
Here you now have the option of searching for the desired region. Simply enter the region in the search field and press the Enter key on the keyboard or click on the magnifying glass to the right. If the region is stored in the database, this region is displayed with all sub-regions. You now only need to select the desired regions and click on the “Import the selected regions” button. These are then imported into onOffice.
You can also import regions from other countries using the country selector on the right. Currently supported countries are: Germany, Belgium, Italy, Liechtenstein, Luxembourg, Switzerland, Spain and Austria.
Regional texts
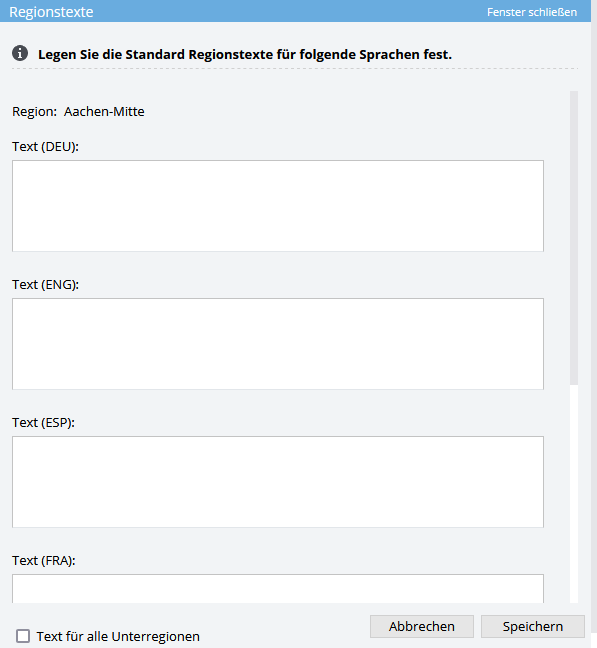
Here you can enter suitable description texts for each region. These are automatically inserted in the free text field “Location” of a property as soon as the property is assigned to the region via the regional addition. If you have already entered a text in the Location field, the region text will not be inserted automatically.
Notice:
Please note: If the property is removed from the region, the automatically inserted text in the “Location” field is retained. You must remove this manually.
Please select a region first and then click on the option ‘Add text to region’: You can enter the text for this region in the following dialog.
With the “Apply text to all sub-regions” option, you can insert text for a level 1 or 2 region that will be applied as a default for all regions below it.
When using the multi-language module, you can also specify region texts for other languages. The text is inserted in the appropriate language according to the country stored for the property.
Please note: If the region is assigned before the additional language is created, the German region text is entered in the free text field ‘Location’. Please delete the German text manually and save, then onOffice will enter the text that matches the language. You must then save again.

 Introduction
 Dashboard
 Addresses
 Properties
 Email
Email Calender
 Tasks
Tasks Acquisition Cockpit
 Audit-proof mail archiving
 Automatic brochure distribution
 Billing
 Groups
 Intranet
 Marketing box
 Multi Property module
 Multilingual Module
 onOffice sync
 Presentation PDFs
 Process manager
 Project management
 Property value analyses
 Request manager
 Showcase TV
 Smart site 2.0
 Statistic Tab
 Statistics toolbox
 Success cockpit
 Time recording
 Address from clipboard
 Boilerplates
 Customer communication
 External Tools
 Favorite links
 Formulas and calculating
 Mass update
 onOffice-MLS
 Portals
 Property import
 Quick Access
 Settings
 Templates
 Step by step