You are here: Home / Modules / Properties / Detailed property view / Files

Properties
Files
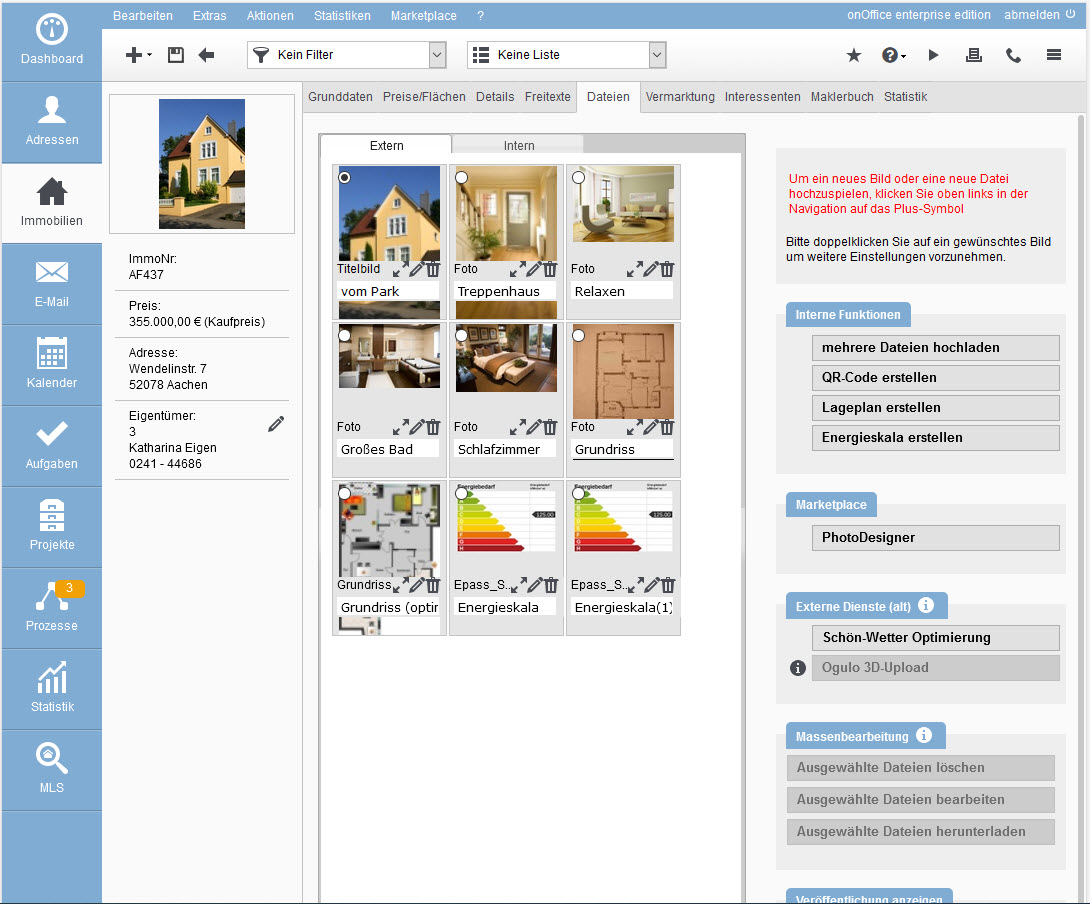
The “Files” tab allows you to upload and optimize all files such as images, Brochures and floor plans relating to your property. The image module makes it possible to upload several images at the same time and to make changes easily using the image preview.
The images can be sorted by simply clicking and dragging them. Label the images by simply writing the image title in the line below the image. You can mark a cover image by setting the “dot” in the top left-hand corner of the image (radio button) or when editing individual files. Please note that the entries must be saved before you change the tab.
Separation between external and internal documents
You will always find your photos, site plans and floor plans on the “External” tab. If you store documents in properties that should never be published, the files can be marked as file type “internal document”. They are then automatically displayed on the “Internal” tab.
Edit images
If you want to edit an image after uploading it, you can use the PhotoDesigner from the Marketplace.
If the Marketplace provider “PhotoDesigner” is activated for you, you will find the entry “PhotoDesigner” under properties >> Files in the Marketplace category.
You can find more information about the image editing program at the PhotoDesignermarketplace providers.
View and open images
If you want to view an image in full screen mode in the “External” tab, click on the “double arrow” to the left of the editing symbol. You can view all images in full-screen mode here by clicking or using the right and left arrow keys on the keyboard.
If you want to open an image or file in the “Internal” tab, double-click on the icon in the “Type” column. This allows you to download the file and then open it. This depends on what you have set for download options in your browser.
Your pictures – your individual order
You can select the cover picture for your property by clicking on the point at the top left of the picture (radio button). Then select the correct sequence of images: To obtain the desired sequence, simply click on the image to be moved, hold down the mouse button and drag and drop the image to the desired position. Enter the title by simply clicking on the image and entering the text in the line below.
The plus in individuality: We would be happy to create a picture gallery for your homepage that is specially tailored to your company – just ask us!
Download all files
This function allows you to download all stored images to your PC as a .zip file. The “Download all files” button can be found in the file category at the bottom right.
A pop-up opens in which you can select all or only certain file types for download. Files can always be downloaded from the “External” and “Internal” tabs, regardless of where you called up the “Download all files” function. Enterprise remembers the selection of file types for the call from the “External” tab; for “Internal”, only “Documents internal” is ever selected.
You can choose between document type and ID (Photo_5629.jpg) and the file title – i.e. the text on the images – for the name of the files in the download. You can set the default in the basic settings .
If you only want to download individual images, you can do this for selected images via “Bulk editing” .
Your pictures – the basic settings
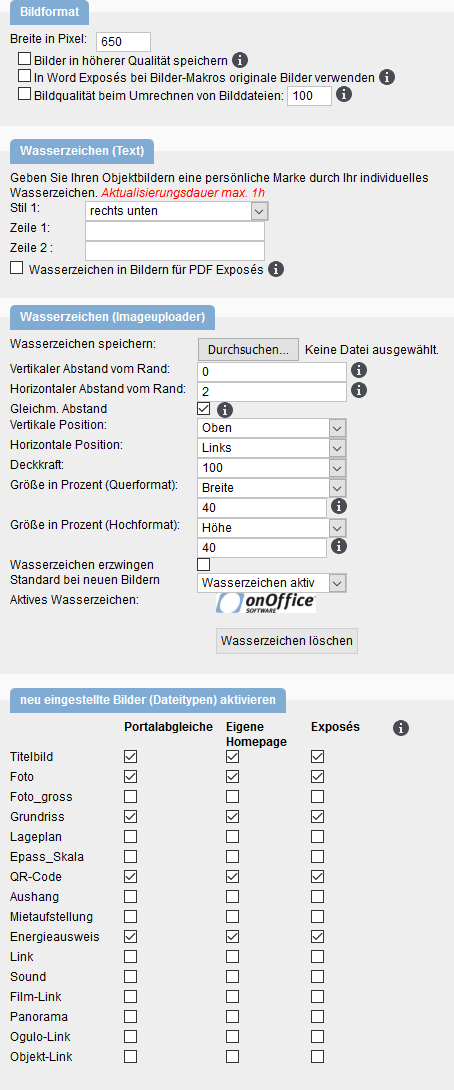
In the basic settings, you make basic activation features around your image files. Go to Extras >> Settings >> Basic settings >> General.
You can protect your images from misuse by adding a watermark . The “Watermark” function provides you with two lines in which you can enter text. Click with the mouse in one of these fields and enter your company name, for example. You now also have the option of selecting where the watermark should appear in the image. Here you can choose between “Transparent centered” or “Bottom right”. If you select “Transparent centered”, the water symbol is displayed transparently in the middle of the image and if you select “Bottom right”, it is displayed in the bottom right-hand corner of the image.
You can find out how to integrate your logo or a graphic as a watermark using the “Watermark (image uploader)” function here.

 Introduction
 Dashboard
 Addresses
 Properties
 Email
Email Calender
 Tasks
Tasks Statistic-Kit
 Statistic-Tab
 Request manager
 Showcase TV
 Acquisition Cockpit
 Marketing box
 Success cockpit
 Process manager
 Groups
 onOffice sync
 Presentation PDFs
 Billing
 Smart site 2.0
 Project management
 Time recording
 Property value analyses
 Multi-Language-Module
 Automatic brochure distribution
 Multi-Object modul
 Intranet
 Audit-proof mail archiving
 Favorite links
 Boilerplates
 Property import
 onOffice-MLS
 Portals
 Address from clipboard
 Mass update
 Formulas and calculating
 Quick Access
 Templates
 Settings
 Customer communication
 External Tools
 Step by step