You are here: Home / Extras / Templates / Template management / Templates email

Templates
Templates email
Inhaltsverzeichnis
Create templates
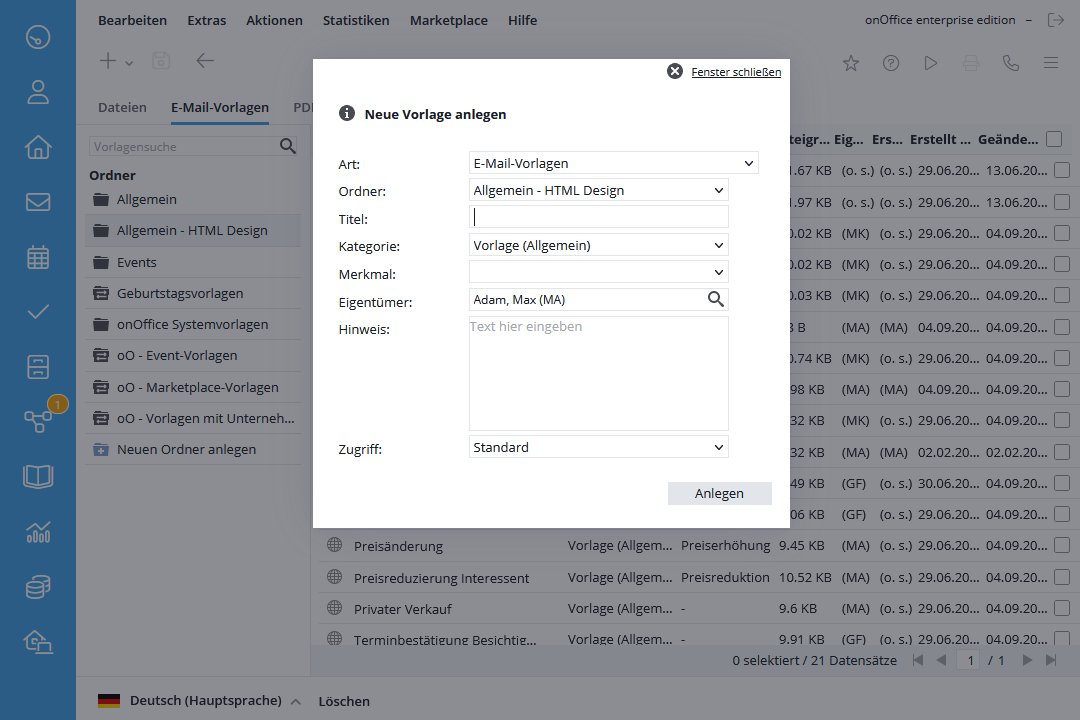
In the template management Edit >> Templates / Files >> email tab , you can create a template via the plus symbol . The necessary details are entered in a lightbox.
Enter a title, a category, etc. Then select the folder in which the template is to be created. When you select a feature, it is saved in the activity and agent log entries that are generated when you send an email with this template. You can create characteristics individually for your needs in the administration .
You can mark the template for special purposes by selecting the category. With the Activity entry category, the template appears when you call up the dialog for creating the owner notification(example) etc.
If a note is entered, it will be displayed later when you select the template when creating the email.
All settings can be changed even after creation.
Click on “Create” to open a pop-up window in which you can enter the content and text of the email as well as the subject.
Select the “HTML” format if you want to create a graphically appealing layout. To insert images and links, you must open the extended menu bar of the CKEditor via the button ![]() . How to create email templates in HTML is explained in detail in our webinars for email templates.
. How to create email templates in HTML is explained in detail in our webinars for email templates.
You can also use macros in the text itself. If you do not write the text here but transfer it from Word, for example, please note that not all formatting can be transferred from Word. In this case, please check the appearance of the email template via the “Preview” tab.
In the “Preview” tab, you can get an idea of what the finished email will look like. Please note that macros cannot be resolved.
Attachments
With template management, you can not only use the standard attachments of the “normal” email composer, but also assign one or more attachments to each template. You can define the desired attachments in the “Attachments” tab. Brochures, PDF letters, PDF forms, document features from property, online(template management files) and your own files are available. When selecting your own / private files, please note that as long as the template is set to public, it can be used by all users and the file can be viewed. New templates can also be created by duplicating existing templates. You can find the corresponding entry in the source template settings.Settings & Delete
The template settings are opened via the wrench . You can change the name, description, etc. here. The entry for deleting the template can also be found here. Several templates can be deleted at once via the list view (checkbox and action bar >> Delete).Edit
You can edit the email templates via the pencil icon . The pop-up opens with the tabs Content / Attachments / Preview, as when creating.Insert templates as source code
If you want to insert a ready-made template or adopt the content of another template, this is often available as “source code”. After copying and pasting, the text contains lots of “<” and “>” as well as technical gibberish.
Please delete the content again and activate the “Source code mode” in the template popup.
To do this, select “HTML” as the format and then open the extended view of the CK editor in the content area by clicking on ![]() . Use the “Source code” button to switch to the source code view.
. Use the “Source code” button to switch to the source code view.
Now you can copy the text from the sample file and paste it in the editor.
Then switch back to the “normal view” by clicking on the “Source code” button again. You should now see the template in legible form.
The “Preview” tab gives you a preview of the finished email – WITHOUT replacing the macros, as neither addresses nor properties are assigned.
If everything meets your expectations, you can save the template.

 Introduction
 Dashboard
 Addresses
 Properties
 Email
Email Calender
 Tasks
Tasks Acquisition Cockpit
 Audit-proof mail archiving
 Automatic brochure distribution
 Billing
 Groups
 Intranet
 Marketing box
 Multi Property module
 Multilingual Module
 onOffice sync
 Presentation PDFs
 Process manager
 Project management
 Property value analyses
 Request manager
 Showcase TV
 Smart site 2.0
 Statistic Tab
 Statistics toolbox
 Success cockpit
 Time recording
 Address from clipboard
 Boilerplates
 Customer communication
 External Tools
 Favorite links
 Formulas and calculating
 Mass update
 onOffice-MLS
 Portals
 Property import
 Quick Access
 Settings
 Templates
 Step by step


