Entry
Entry Dashboard
 Contacts
 Properties
 Email
Email Calendar
 Tasks
Tasks Acquisition Cockpit
 Audit-proof mail archiving
 Automatic brochure dispatch
 Billing
 Groups
 Intranet
 Marketing Box
 Multi Property module
 Multilingual Module
 onOffice sync
 Presentation PDFs
 Process manager
 Project Management
 Property value analyses
 Enquiry Manager
 Showcase TV
 Smart site 2.0
 Statistic Tab
 Statistics toolbox
 Success Cockpit
 Time Tracking
 Address from clipboard
 Text block
 Customer communication
 External Tools
 Favorite links
 Calculating with formulas
 Mass update
 onOffice-MLS
 Portals
 Property import
 Quick Access
 Settings
 Templates
 Step by step
You are here: Home / Modules / Properties / Detailed property view / Agent’s log / Create/edit agent's log entry

Properties
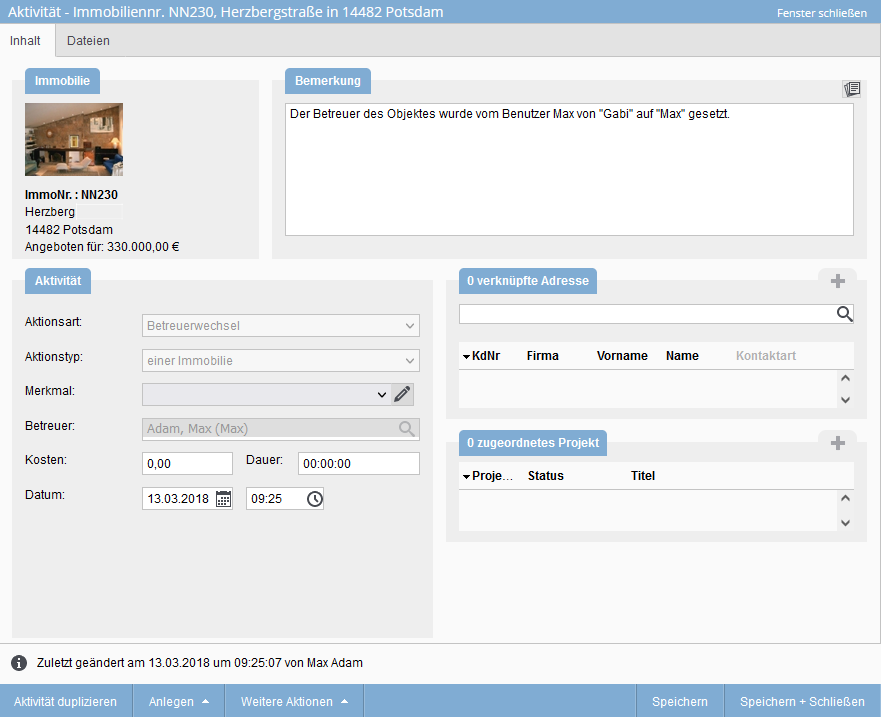
Create/edit agent’s log entry
Create new entry / edit
Use the plus symbol ![]() to create a new agent’s log entry, provided you are on the agent’s log tab. You can also create a new agent’s log entry in a property via .
to create a new agent’s log entry, provided you are on the agent’s log tab. You can also create a new agent’s log entry in a property via .
The default settings from the administration are selected for the singleselect fields. However, you can change them under
Edit entry
To edit individual entries click on the edit icon ![]() .
.
- Left click on
 opens a pop-up window
 - Double click on the agent’s log entry opens a pop-up window
- Right click on + “Open link in new tab” opens a new tab
- Mouse wheel click on opens a new tab
- CTRL / CMD + left click on opens a new tab
The editing level of an existing agent’s log entry appears. Here you have the possibility to duplicate the entry, to do that click the Duplicate Activity button in the Actions Panel of the individual entry.
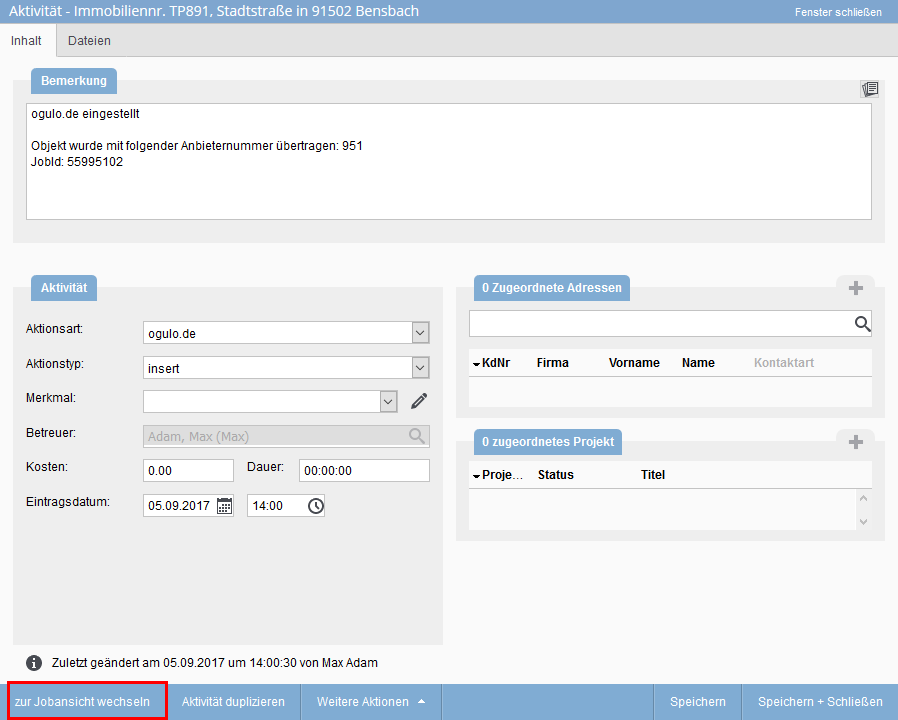
Remarks
More detailed information about the agent’s log entry is entered under Remark. You can store these yourself. Entries that are based on an email have the email text entered as a comment. In addition, you can simplify the entry of remarks for the respective entry by creating text modules, which you can use via a few clicks. To use text modules click the button ![]() to the right of the comments field. A more detailed definition of text modules and how to create them can be found here.
to the right of the comments field. A more detailed definition of text modules and how to create them can be found here.
Area – Activity
Define the agent’s log entry regarding your properties record via the type of action. Additional information can be specified with the kind of action and if you want to assign custom features to your agent’s log entry, you can do so under “Feature”.
In addition, in the “Activity” section you have the possibility to specify and document the responsible supervisor, the effort and the duration of the work / deadline / processing of the task. The choices change according to the previous action.
Info-i
The info-i contains information about when and by whom the entry was set or last edited. You can also find more species-specific information there.
For certain combinations of type of action and kind of action, an additional action feature is automatically set by the system.
An example is the action feature “Brochure dispatch”, which is set if an brochure was sent to a customer by letter, email or download link. In the last case of the download link, another action feature Download link is set.
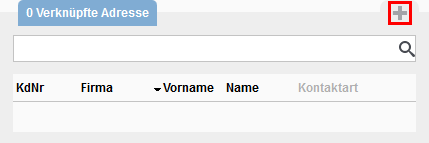
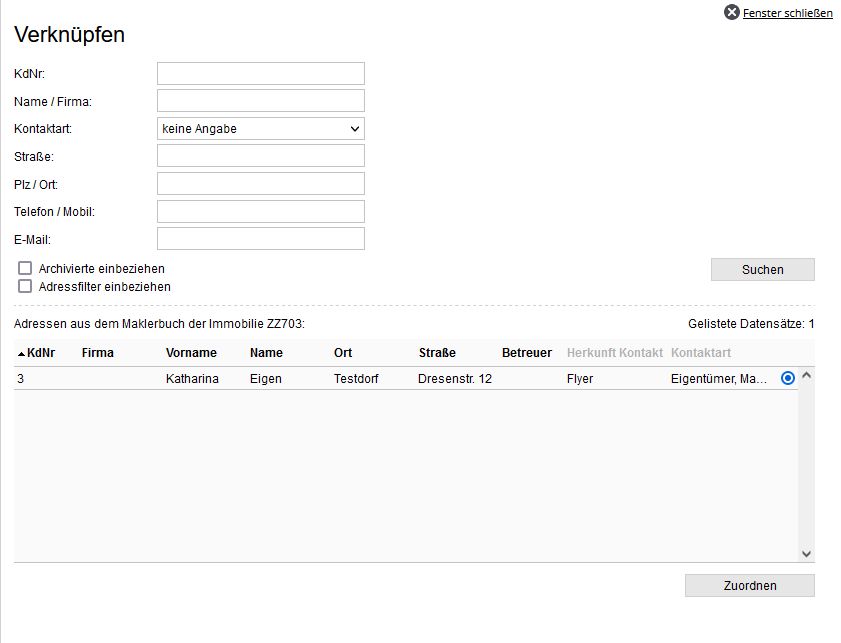
Address assignment
You can add more addresses by either quickly searching for them in the search bar or by clicking on the plus icon to the right above each box.